 Using Page Thumbnails and Bookmarks in PDFs
Thumbnails and the Thumbnails Pane
Thumbnails are miniature previews of document pages that are used to navigate documents/document pages and edit documents on the page-level. Operations that you perform on thumbnails in the Thumbnails pane, such as moving or deleting thumbnails, are applied to the associated pages of the current document. Click the View tab, then click the Panes dropdown menu and click Thumbnails to open the Thumbnails pane:

Figure 1. View Tab, Panes Dropdown Menu, Thumbnails Pane Highlighted and Open
•The orange rectangle represents the current page view.
•Click on pages/page locations in the Thumbnails pane to move to those locations in the active document.
•Click and drag thumbnails to reorder the corresponding pages in the active document.
•Press and hold Ctrl to select multiple pages for group-editing.
•Press Ctrl+A to select all pages in the Tumbnails pane.
•The Thumbnails pane can be used to create page ranges. Click the first page of the desired range, then press and hold Shift and click the final page of the desired range.
•The Thumbnails pane can also be used to copy pages between open documents. Select the desired pages, then right-click and select Copy in the submenu. Move to the desired location in the Thumbnails pane of the destination document, then right-click and select Paste to complete the operation.
Use the icons in the Thumbnails pane to perform the following operations:
Click ![]() Zoom In to zoom in on thumbnails.
Zoom In to zoom in on thumbnails.
Click ![]() Zoom Out to zoom out from thumbnails.
Zoom Out to zoom out from thumbnails.
Click ![]() Rotate Pages CCW 90° to rotate selected pages ninety degrees counterclockwise.
Rotate Pages CCW 90° to rotate selected pages ninety degrees counterclockwise.
Click ![]() Rotate Pages CW 90° to rotate selected pages ninety degrees clockwise.
Rotate Pages CW 90° to rotate selected pages ninety degrees clockwise.
Click ![]() Print to print documents.
Print to print documents.
Click ![]() Delete to delete selected pages.
Delete to delete selected pages.
Click ![]() Properties to view/edit the properties of selected pages.
Properties to view/edit the properties of selected pages.
Right-click thumbnails for additional options:
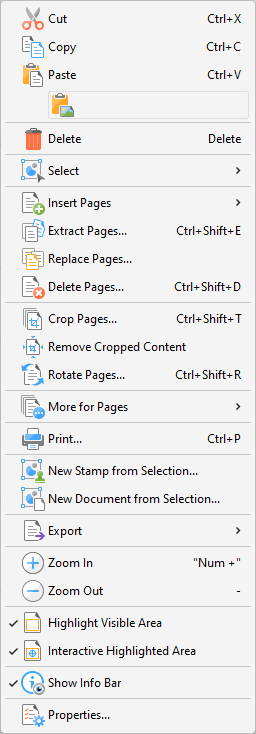
Figure 2. Thumbnails Options
•Click Cut, Copy, Paste or Delete to perform these actions on selected thumbnails.
•Click Select to select a subset of pages in the Thumbnails pane, then select the desired option in the shortcut menu:
•Click Select All to select all pages.
•Click Pages with Comments to select all pages that contain comments.
•Click Pages with Form Fields to select all pages that contain form fields.
•Click Pages with Bookmarks to select all pages that contain bookmarks.
•Click Pages with Text to select all pages that contain text.
•Click Pages with Images to select all pages that contain images.
•Click Pages with Search Results to select all pages that contain search results returned via the Search feature.
•Click Empty Pages to select all empty pages.
•Click Invert Selection to invert the current selection of pages in the Thumbnails pane.
•Click Insert Pages to insert pages at the selected location in the Thumbnails pane, as detailed here.
•Click Extract Pages to copy and save selected pages, as detailed here.
•Click Replace Pages to replace selected pages, as detailed here.
•Click Delete Pages to delete selected pages, as detailed here.
•Click Crop Pages to crop selected pages, as detailed here.
•Click Remove Cropped Content to remove cropped content from documents. This feature is intended for use in conjunction with the Crop Pages feature. Cropping pages reduces the visible page area, but cropped content remains available (and takes up memory) unless this option is also used.
•Click Rotate Pages to view the Rotate Pages options, which are explained here.
•Click More for Pages to view/select further options for pages:
•Click Duplicate Pages to duplicate pages.
•Click Resize Pages to resize pages.
•Click Split Pages to split pages.
•Click Merge Pages to merge pages
•Click Swap Pages to swap the location of two pages.
•Click Move Pages to move the location of pages.
•Click Page Transitions to change the manner in which documents browse between pages in fullscreen mode.
•Click Number Pages to number document pages and create number ranges.
•Click Print to print documents, as detailed here.
•Click New Stamp from Selection to create a new stamp from selected thumbnails, as detailed here.
•Click New Document from Selection to create a new document from selected thumbnails.
•Click Export to view export options:
•Click Export to Image(s) to convert selected thumbnails into images. The Export to Image(s) dialog box will open. See here for further information.
•Click Export selection to Microsoft Word Document to convert and save selected thumbnails in (*.docx) format.
•Click Export selection to Microsoft Excel to convert and save selected thumbnails in (*.xlsx) format.
•Click Export selection to Microsoft Powerpoint Presentation to convert and save selected thumbnails in (*.pptx) format.
•Click Zoom In to zoom in on the Thumbnails pane.
•Click Zoom Out to zoom out from the Thumbnails pane.
•Highlight Visible Area is selected by default. This means the area of the document currently visible in the main window is highlighted in the corresponding page of the Thumbnails pane. Disable this option to remove the highlight box.
•Interactive Highlighted Area is selected by default. This means it is possible to click and drag the Highlight Visible Area detailed above to adjust the page view in the main window. Click and drag the ![]() icon to adjust the page view.
icon to adjust the page view.
•Click Properties to view/edit the properties of selected pages.
Bookmarks and the Bookmarks Pane
Bookmarks are used to designate specific places of importance within documents. All bookmarks are detailed in the Bookmarks pane and each bookmark goes to a different location in the document. The default location of a bookmark is the current view of the document when the bookmark is created. Click the View tab, then click the Panes dropdown menu and click Bookmarks to open the Bookmarks pane:
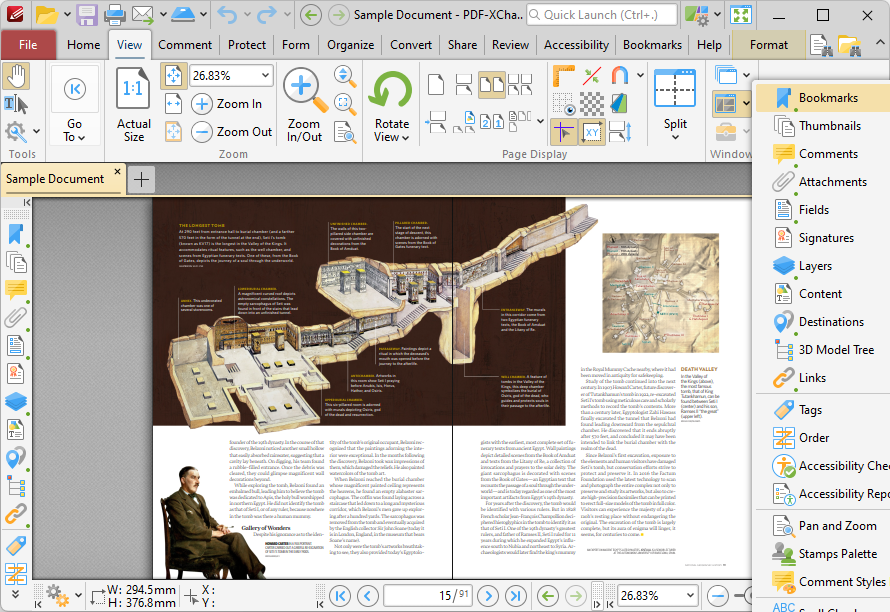
Figure 3. View Tab, Panes Dropdown Menu, Bookmarks Highlighted and Bookmarks Pane Open
Use the icons in the Bookmarks pane to perform the following operations:
Click ![]() Expand All Bookmarks to expand all bookmarks.
Expand All Bookmarks to expand all bookmarks.
Click ![]() Collapse All Bookmarks to collapse all bookmarks.
Collapse All Bookmarks to collapse all bookmarks.
Click ![]() New Bookmark to create a new bookmark. See Keyboard Shortcuts for available keyboard shortcuts when creating new bookmarks. Note that you can use the Select Text Tool to select document text before creating a bookmark in order to use the selected text as the name for the new bookmark.
New Bookmark to create a new bookmark. See Keyboard Shortcuts for available keyboard shortcuts when creating new bookmarks. Note that you can use the Select Text Tool to select document text before creating a bookmark in order to use the selected text as the name for the new bookmark.
Click ![]() Delete to delete selected bookmarks.
Delete to delete selected bookmarks.
Click ![]() Ensure Visibility of Corresponding Bookmark to ensure that parent bookmarks expand in a manner that ensures the visibility of corresponding bookmarks.
Ensure Visibility of Corresponding Bookmark to ensure that parent bookmarks expand in a manner that ensures the visibility of corresponding bookmarks.
Click ![]() Properties to view/edit the properties of selected bookmarks. The Bookmark Properties pane will open:
Properties to view/edit the properties of selected bookmarks. The Bookmark Properties pane will open:
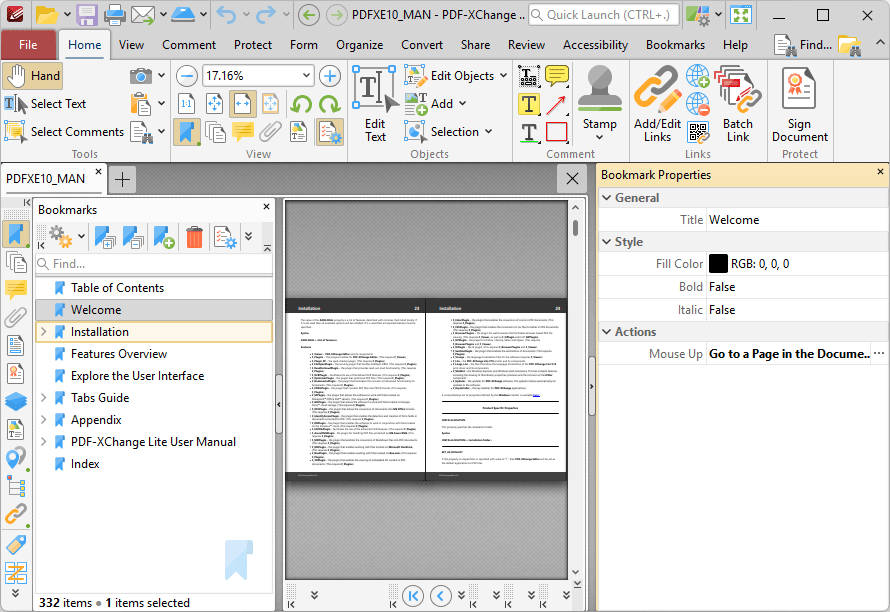
Figure 4. Bookmark Properties Pane
•The Title property displays the bookmark title. Click the text to edit the bookmark title.
•The Fill Color property displays the color of the bookmark title. Click to edit the color of the bookmark title.
•The Bold and Italic properties display the parameter values for whether or not the bookmark title is bold or italic. Click values to change the property from False to True as desired.
•The Mouse Up property displays the action performed when the bookmark is clicked. The default action is Go to a Page in the Document, which is the standard action that bookmarks perform. However, there are a range of alternative actions are available, including the activation of JavaScript, opening of weblinks and execution of PDF-XChange Editor commands. A comprehensive list of available actions, and instructions on how to add/edit their parameters, is available here.
Creating a Bookmark Hierarchy and Editing Bookmarks in the Bookmarks Pane
When you are creating bookmarks, it is possible to create a bookmark nest in order to show the relationship between the topics to which the bookmarks point. A parent/child relationship is created between nested bookmarks, and you can expand/collapse these hierarchical lists as desired. Once you have created bookmarks, simply click and drag them within the bookmarks pane to create bookmark hierarchies:

Figure 5. Creating a Bookmark Hierarchy

Figure 6. Completed Bookmark Hierarchy
Click ![]() Options, or right-click bookmarks, for bookmark options:
Options, or right-click bookmarks, for bookmark options:
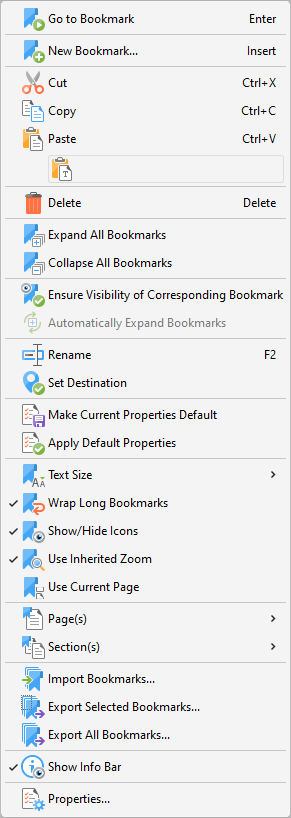
Figure 7. Bookmarks Options
•Click Go To Bookmark to move to the bookmark currently selected.
•Click New Bookmark to create a new bookmark.
•Click Cut, Copy, Paste, Delete and Rename to perform these actions on selected bookmarks.
•Click Expand/Collapse All Bookmarks to expand/collapse all bookmarks.
•Click Ensure Visibility of Corresponding Bookmark to expand parent bookmarks in a manner that ensures the visibility of corresponding bookmarks.
•Click Automatically Expand Bookmarks to expand all child bookmarks by default.
•Click Set Destination to change the location of the selected bookmark to the current view of the active document.
•Click Make Current Properties Default to set the properties of the current bookmark as the default setting for subsequent bookmarks.
•Click Apply Default Properties to apply the default bookmark properties to selected bookmarks.
•Hover over Text Size to set the font size of bookmark titles, then select either Small, Medium or Large in the submenu.
•Click Wrap Long Bookmarks to fit bookmarks with long names to the dimensions of the Bookmarks pane. If this option is not enabled then bookmark titles will be displayed as a single line regardless of their length.
•Click Show/Hide Icons as desired.
•Click Use Inherited Zoom to retain the current zoom level when bookmarks are clicked. If this option is disabled then the zoom level will change to the level that was current when the bookmark was created.
•Click Use Current Page to use the current page as the destination when bookmarks are created. If this option is not selected then the first visible page after the current page will be used.
•Hover over Pages to view options for pages:
•Click Print to print the pages designated to the bookmark and its child bookmarks. The Print dialog box will open with the designated pages in the Page Range box.
•Click Extract to extract the pages designated to the bookmark and its child bookmarks to a new document. The Extract Pages dialog box will open with the designated pages in the Page Range box.
•Click Select to select the pages designated to the bookmark and its child bookmarks in the Thumbnails pane, which will open with the designated pages selected.
•Hover over Sections to view options for sections:
•Click Print to print the sections designated to the bookmark and its child bookmarks. The Print dialog box will open with the designated sections in the Page Range box.
•Click Extract to extract the sections designated to the bookmark and its child bookmarks to a new document. The Extract Pages dialog box will open with the designated sections in the Page Range box.
•Click Select to select the sections designated to the bookmark and its child bookmarks in the Thumbnails pane, which will open with the designated sections selected.
•Click Import Bookmarks to import saved bookmarks.
•Click Export Selected Bookmarks to export selected bookmarks.
•Click Export All Bookmarks to export all bookmarks.
•Click Properties to view/edit the properties of selected bookmarks, as detailed in (figure 4).
Further bookmark options are available in the Bookmarks tab:
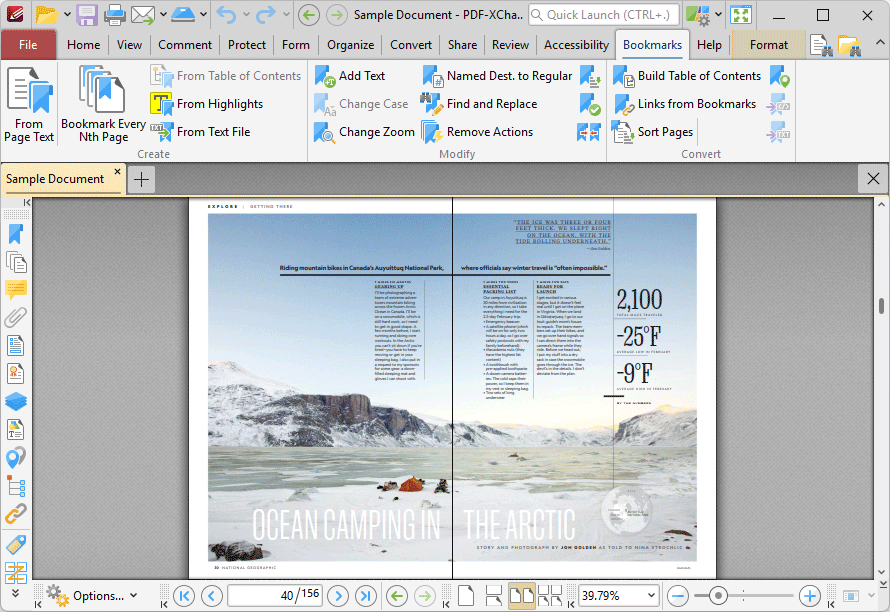
Figure 8. Bookmarks Tab
•Click ![]() From Page Text to create bookmark generators that create bookmarks from document text, as detailed here.
From Page Text to create bookmark generators that create bookmarks from document text, as detailed here.
•Click ![]() Bookmark Every Nth Page to create bookmarks from pages at user-defined intervals, as detailed here.
Bookmark Every Nth Page to create bookmarks from pages at user-defined intervals, as detailed here.
•Click ![]() From Table of Contents to create bookmarks from the table of contents in the current document, as detailed here.
From Table of Contents to create bookmarks from the table of contents in the current document, as detailed here.
•Click ![]() From Text File to create bookmarks from text-based files, as detailed here.
From Text File to create bookmarks from text-based files, as detailed here.
•Click ![]() Add Text to add prefixes/suffixes to bookmark titles, as detailed here.
Add Text to add prefixes/suffixes to bookmark titles, as detailed here.
•Click ![]() Change Case to change the case of bookmark titles, as detailed here.
Change Case to change the case of bookmark titles, as detailed here.
•Click ![]() Change Zoom to change the zoom level of bookmarks, as detailed here.
Change Zoom to change the zoom level of bookmarks, as detailed here.
•Click ![]() Named Dest. to Regular to convert named destinations to regular destinations, as detailed here.
Named Dest. to Regular to convert named destinations to regular destinations, as detailed here.
•Click ![]() Find and Replace to locate specified text in bookmarks and replace it with custom text, as detailed here.
Find and Replace to locate specified text in bookmarks and replace it with custom text, as detailed here.
•Click ![]() Sort Bookmarks to sort bookmarks, as detailed here.
Sort Bookmarks to sort bookmarks, as detailed here.
•Click ![]() Validate Bookmarks to validate the functionality of bookmarks, as detailed here.
Validate Bookmarks to validate the functionality of bookmarks, as detailed here.
•Click ![]() Merge Duplicate Bookmarks to merge bookmarks with identical names, as detailed here.
Merge Duplicate Bookmarks to merge bookmarks with identical names, as detailed here.
•Click ![]() Build Table of Contents to create a table of contents from document bookmarks, as detailed here.
Build Table of Contents to create a table of contents from document bookmarks, as detailed here.
•Click ![]() Create Links from Bookmarks to create links in document text from bookmarks, as detailed here.
Create Links from Bookmarks to create links in document text from bookmarks, as detailed here.
•Click ![]() Sort Pages by Bookmarks to sort document pages according to the order of bookmarks, as detailed here.
Sort Pages by Bookmarks to sort document pages according to the order of bookmarks, as detailed here.
•Click ![]() Convert to Named Dest. to convert bookmarks to named destinations, as detailed here.
Convert to Named Dest. to convert bookmarks to named destinations, as detailed here.
•Click ![]() Export to HTML to export a copy of the bookmarks' structure to an .html file, as detailed here.
Export to HTML to export a copy of the bookmarks' structure to an .html file, as detailed here.
•Click ![]() Export to Text File to export a copy of bookmarks to a text file, as detailed here.
Export to Text File to export a copy of bookmarks to a text file, as detailed here.