 From Text Files
Click From Text Files to convert text files into PDF:
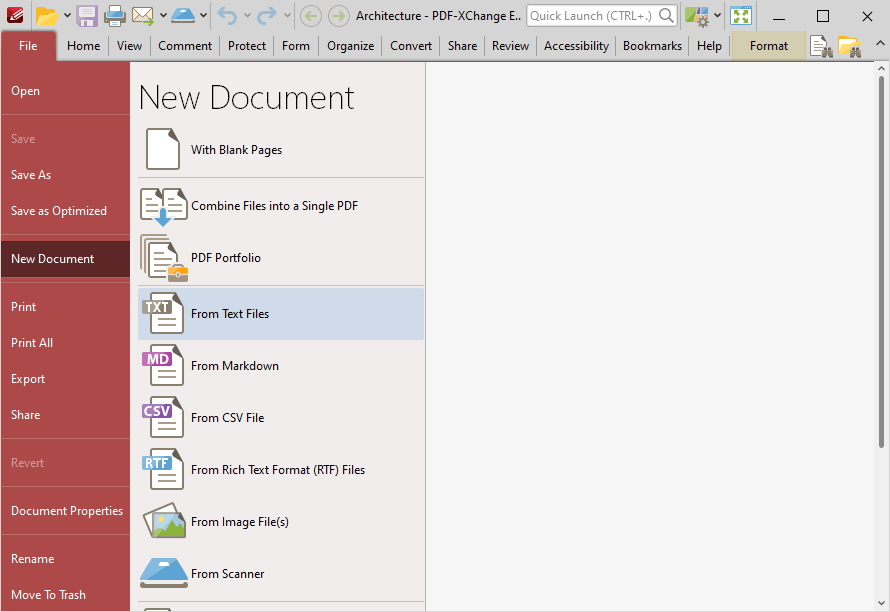
Figure 1. File Tab Submenu, New Document Options, From Text Files
The Convert Text Files to PDF dialog box will open:
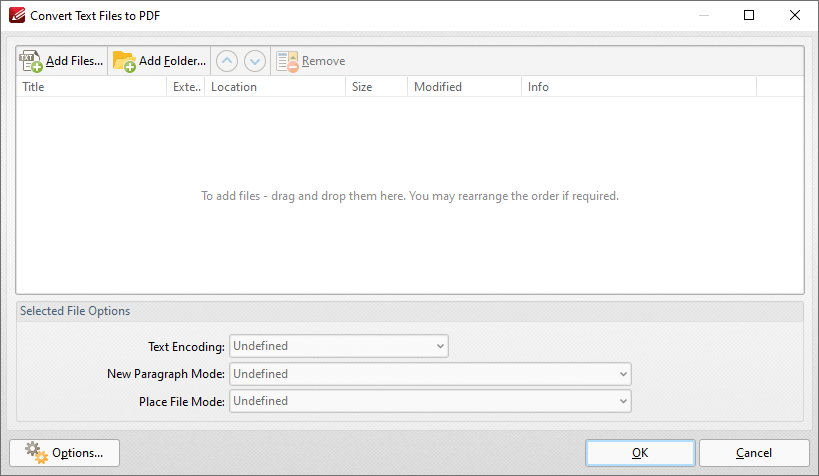
Figure 2. Convert Text Files to PDF Dialog Box
The options in this section are the same as those outlined in the Combine Files into a Single PDF section, with the difference that files must be in plain text (*.txt) format. There are also additional options in the Selected File Options section:
•Text Encoding sets the text encoding format. This determines the representation of language-specific characters within imported files.
•New Paragraph Mode defines when new paragraphs are started. There are four options:
•Auto Detect is the default setting. The software will detect automatically when new paragraphs begin.
•Each newline character starts a new paragraph. (A newline is a special character in computing that signifies the end of a line of text).
•Double newline character starts a new paragraph, singles ignored.
•Double newline character starts a new paragraph, singles converted into space.
•Place File Mode determines what happens with each file as it is placed in the combined document. There are two options:
•Start each file from a new paragraph.
•Start each file from a new page.
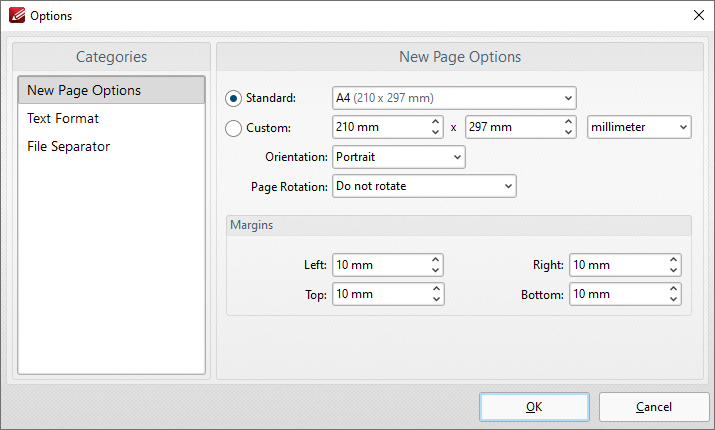
•Click Options to view/edit further options:
Figure 3. Options Dialog Box
New Page Options
•The Standard option centers the original files in a new PDF of standard size. 'Standard' refers to common sizes such as those used by the ISO and ANSI.
•The Custom option allows the user to enter custom dimensions.
•The Orientation option has the settings Portrait or Landscape as the page orientation.
•The Page Rotation option rotates images as required during conversion.
•The Margins options facilitate the customization of the image margins. Enter the values desired into the number boxes. The new PDF will feature these dimensions.
Text Format
When this option is selected, the following dialog box will open:
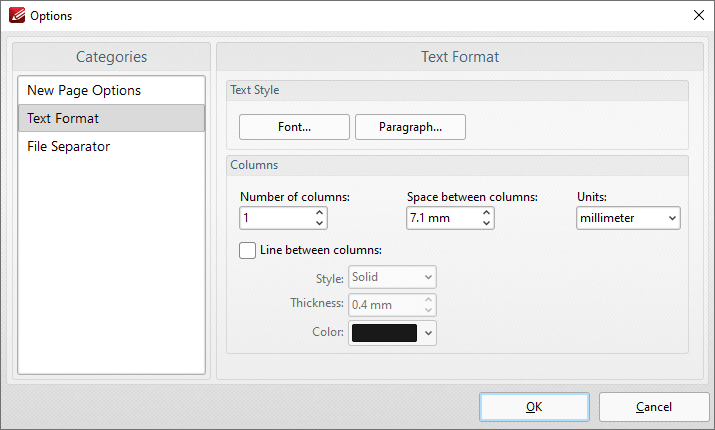
Figure 4. Text Format Options
•The Font and Paragraph buttons determine the font and paragraph settings of the text.
•The Columns options determine the number of columns of text, spaces between columns and unit of measurement for the spaces.
•Select the Line between columns box to insert lines between the columns of text. The Style, Thickness and Color settings determine the parameters of the lines.
File Separator
The File Separator inserts a label that shows a divide between files after they have been combined into one document. When the File Separator option is selected, the following dialog box opens:
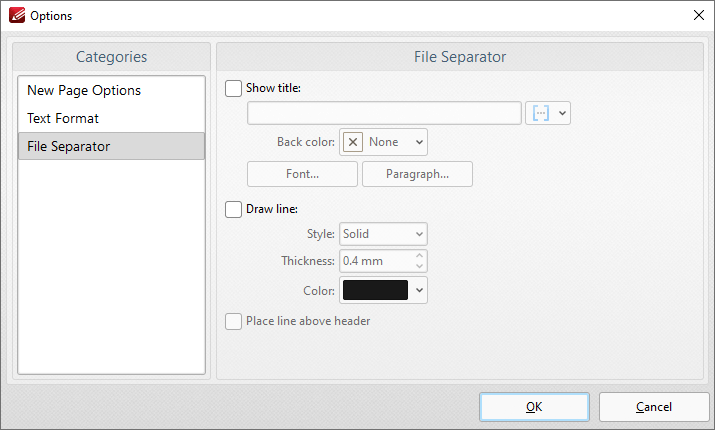
Figure 5. File Separator Options
•Select the Show title box to give the file separator a title. Click the icon to add macros.
•The Back color option determines the color of the file separator.
•The Font and Paragraph settings determine the font style and paragraph layout of the file separator.
•Select the Draw line box to add a line to the file separator. Use the menus to determine Style, Thickness and Color options.
•Select the Place line above header box to position the line above the header of the document.
Click OK to save settings.
