 Rotate, Move, Copy, Delete and Renumber PDF Pages
When you are editing PDF documents, it is often useful to be able to manipulate entire pages. The options detailed in this section can be used to rotate, move, delete and renumber pages.
Rotating Pages
Click the Organize tab, then click Rotate:
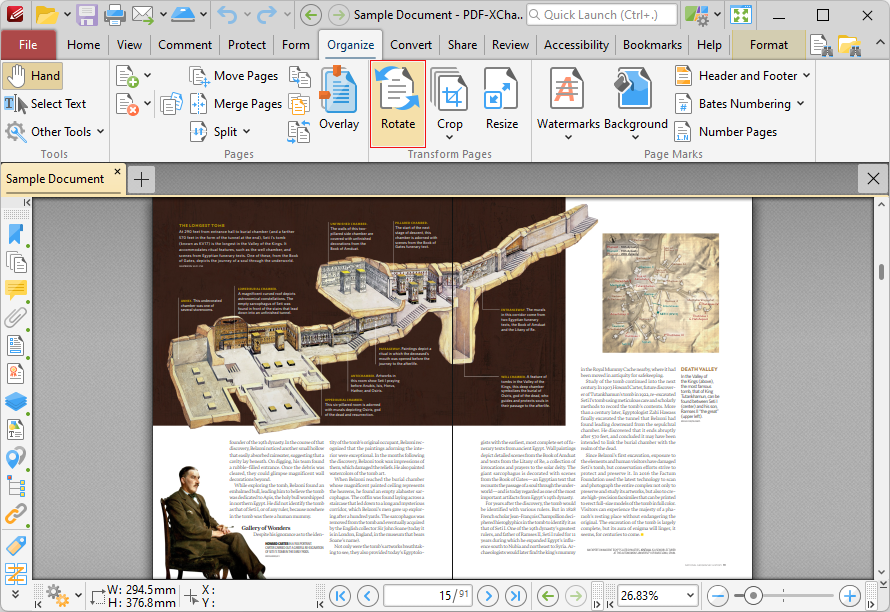
Figure 1. Organize Tab, Rotate Feature Highlighted
The Rotate Pages dialog box will open:
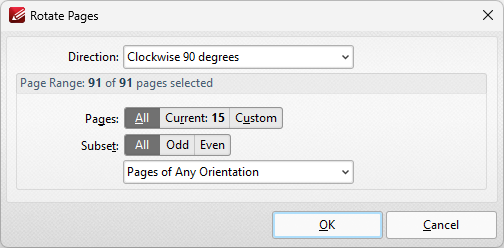
Figure 2. Rotate Pages Dialog Box
•Use the Direction dropdown menu to determine the rotation.
•Use the Page Range options to determine the page range of rotated pages:
•Select All to rotate all pages.
•Select Selected Pages to rotate the pages currently selected in the Thumbnails pane.
•Select Current Page to rotate the current page.
•Select Pages to specify a custom page range. Further information on the specification of page ranges is available here.
•Use the Subset dropdown menu to select a subset of the specified page range. Select All Pages, Odd Pages Only or Even Pages Only as desired.
Click OK to rotate pages.
You can also use the green arrows in the Home tab to rotate pages temporarily for viewing/editing purposes:
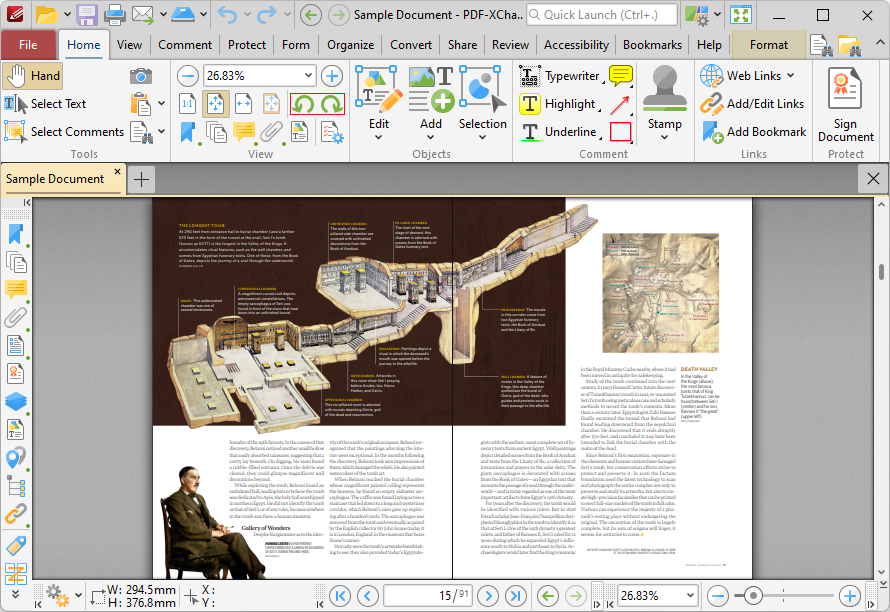
Figure 3. Home Tab, Rotate Pages Arrows
When this option is used to rotate pages, the operation is performed on a temporary basis and does not make permanent changes to the file, as in the first option.
Moving/Copying/Deleting Pages
The Thumbnails pane can be used to move pages to different locations in a document and to copy pages between documents. Click the View tab, then click the Panes dropdown menu and click Thumbnails (or press Ctrl+T) to open the Thumbnails pane:
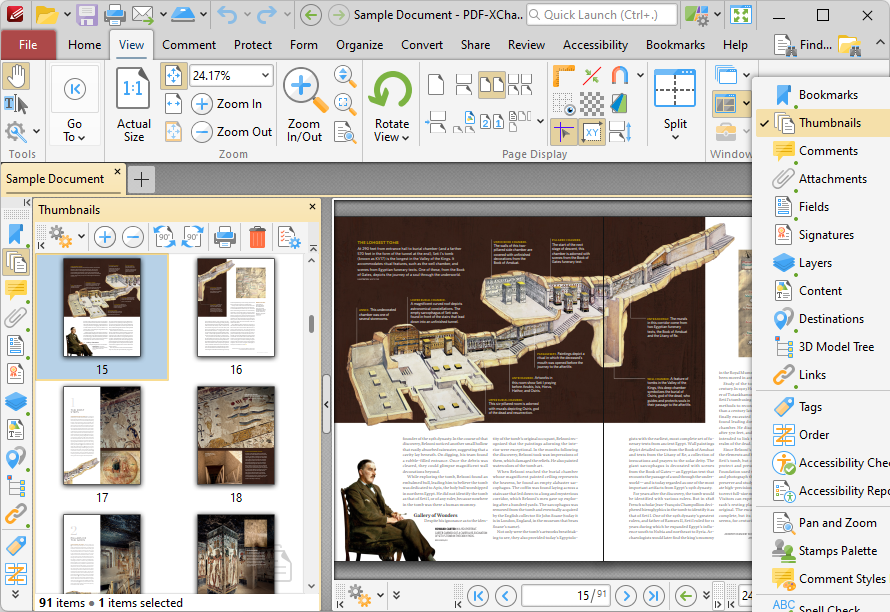
Figure 4. View Tab, Panes Dropdown Menu, Thumbnails Selected and Open Thumbnails Pane
The Thumbnails pane displays a thumbnail for each page of the open document. Thumbnails provide a convenient method to view, manage and edit document pages.
•The orange rectangle represents the current page view.
•Click on pages/page locations in the Thumbnails pane to move to those locations in the active document.
•Click and drag thumbnail pages to reorder them in the active document.
•Press and hold Ctrl to select multiple pages for group-editing.
•Press Ctrl+A to select all pages in the Thumbnails pane.
•The Thumbnails pane can be used to create page ranges. Click the first page of the desired range, then press and hold Shift and click the final page of the desired range.
•The Thumbnails pane can also be used to copy pages between open documents. Select the desired pages, then right-click and select Copy in the submenu. Move to the desired location in the Thumbnails pane of the destination document, then right-click and select Paste to complete the operation.
•Use the icons in the Thumbnails pane to perform the following operations:
•Click Zoom In to zoom in on thumbnails.
•Click Zoom Out to zoom out from thumbnails.
•Click Rotate Pages CCW 90° to rotate selected pages ninety degrees counterclockwise.
•Click Rotate Pages CW 90° to rotate selected pages ninety degrees clockwise.
•Click Print to print documents.
•Click Delete to delete selected pages.
•Click Properties to view the properties of selected pages.
Renumbering Pages
The page numbers of documents do not always match the page numbers detailed in the Thumbnails pane and the Page Navigation toolbar. This is often the case in documents that feature 'front matter' such as copyright pages and/or a table of contents and other similar pages. The Number Pages feature can be used to rectify this issue, as detailed below. (Note that this feature relates to page numbers/ranges as they appear in only the Thumbnails pane and the Page Navigation toolbar. If you want to change the physical page numbers of documents then use the Header and Footer feature).
Click the Organize tab, then click Number Pages:

Figure 5. Organize Tab, Number Pages Highlighted
The Page Numbering dialog box will open:
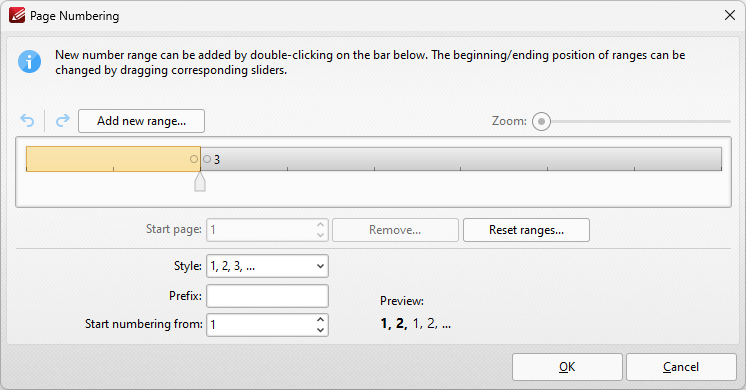
Figure 6. Page Numbering Dialog Box
Click Add New Range. The Add New Range dialog box will open:
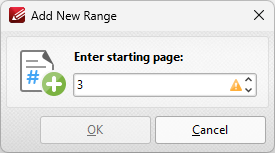
Figure 7. Add New Range Dialog Box
Enter the page number of the first page of the desired range, then click OK in the Add New Range and Page Numbering dialog boxes. Note that logical page numbering must be enabled in order for these changes to be visible. If you want to enable logical page numbering, then click the File tab and click Preferences:
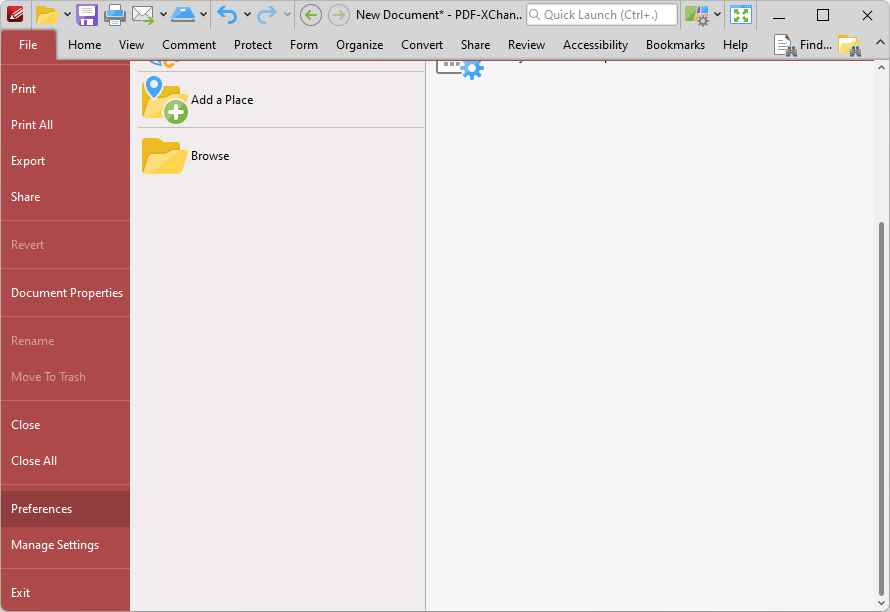
Figure 8. File Tab, Preferences
The Preferences dialog box will open.
Click Page Display in the Categories menu, then select the Use logical page numbers box:
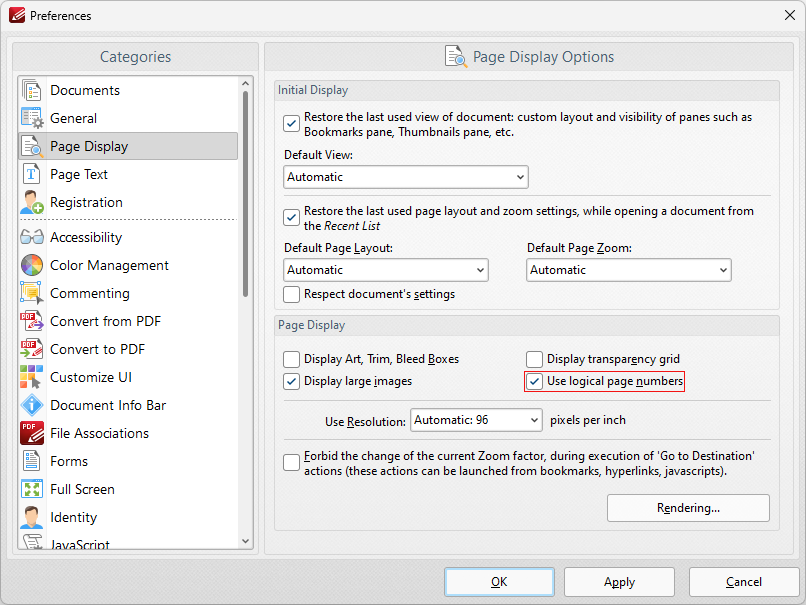
Figure 9. Page Display Preferences, Use Logical Page Numbers Highlighted
Click Apply and then click OK.
Note that 'front matter' pages (such as copyright pages and/or a table of contents) will retain their existing numbering when operation detailed above is performed. If you want to change the numbering style of those pages then follow the steps below:
1. Click the Organize tab, then click Number Pages:

Figure 10. Organize Tab, Number Pages
The Page Numbering dialog box will open.
2. Select the page range that contains the copyright and table of contents pages, then click the Style dropdown menu and select a new style, such as Roman numerals:
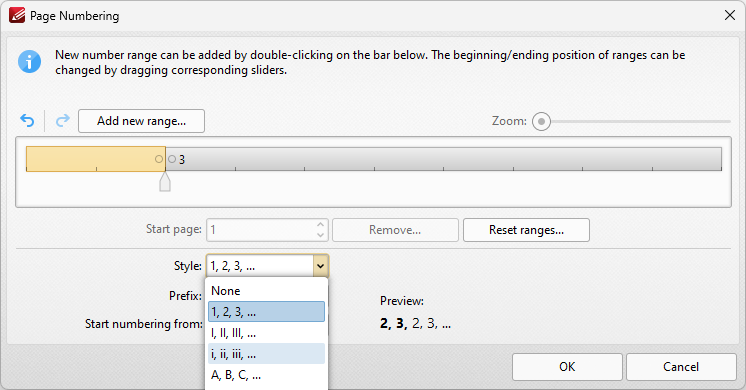
Figure 11. Page Numbering Dialog Box, Roman Numerals Selected
3. Click OK. The page range style of the front matter of the document will then update to the specified style:
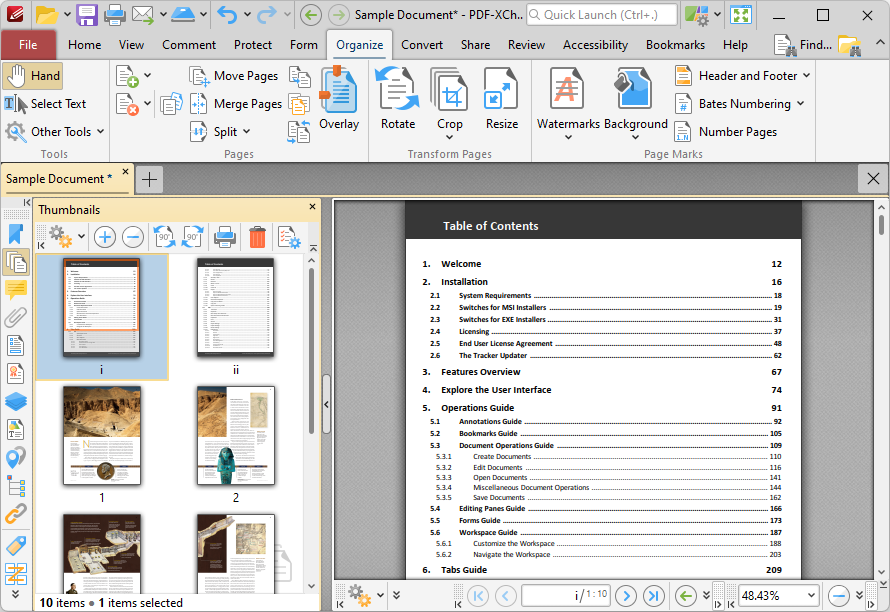
Figure 12, Page Numbering Style Updated