 Creating PDFs with PDF-XChange Editor
There are a range of methods that can be used to create PDFs in PDF-XChange Editor. You can use the menu commands, drag and drop files onto the PDF-XChange Editor desktop shortcut icon or user interface, combine files into a single PDF, create PDF files from other formats or convert clipboard data to a new PDF.
Create a New PDF
1. Click the File tab.
2. Click New Document, then click With Blank Pages:
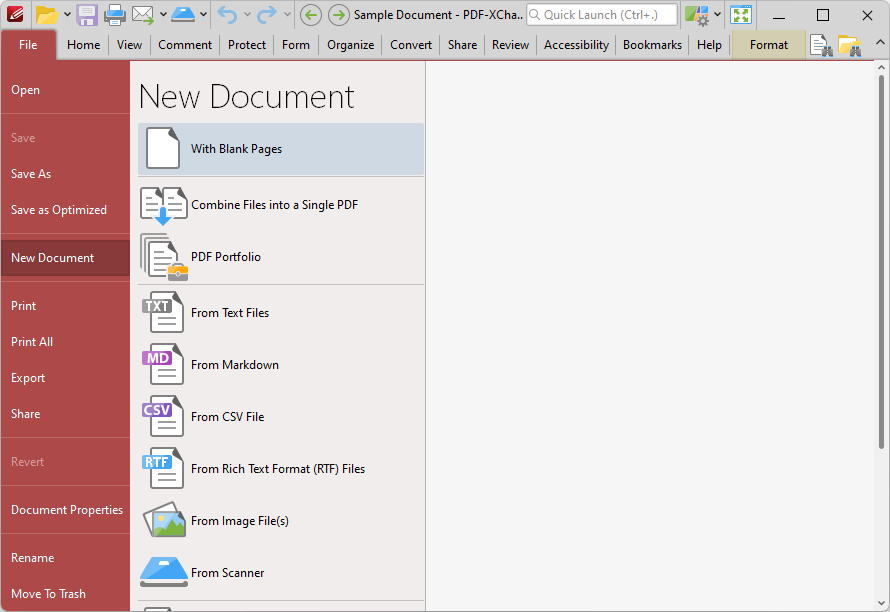
Figure 1. File Tab, New Document Options, With Blank Pages
The New Empty Document dialog box will open:
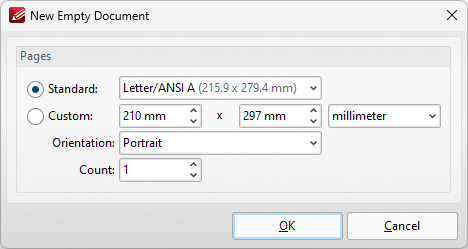
Figure 2. New Empty Document Dialog Box
3. Select the desired properties of the new document. Please note:
•The Standard options are standard dimensions for documents such as those used by the ISO and ANSI.
•The Custom options can be used to enter custom dimensions. Enter the desired measurements into the text boxes and select the units of measurement.
•Select either Portrait or Landscape as the orientation.
•The Count option determines how many blank pages are created.
4. Click OK to create the new document.
Create a PDF Document from an Image File
1. Click the File tab.
2. Click New Document, then click From Image File(s):
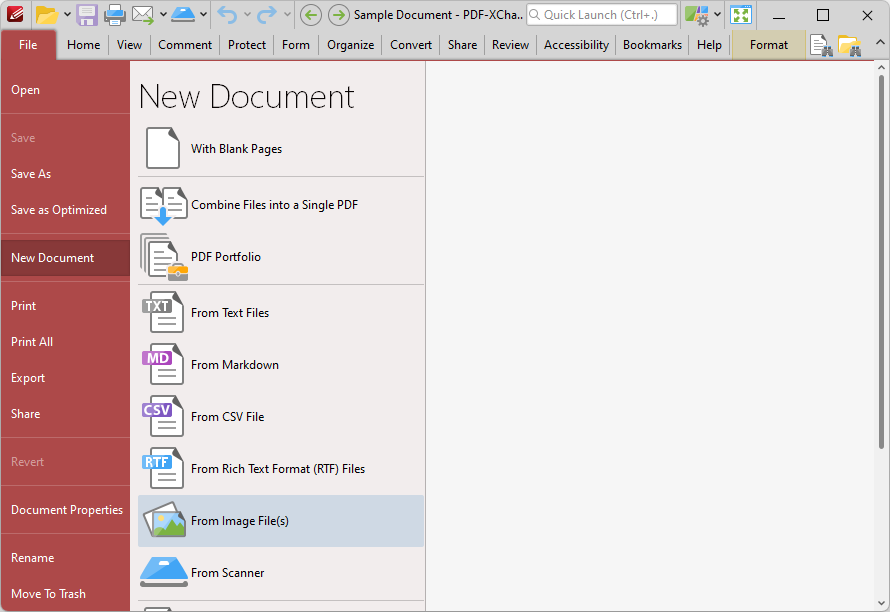
Figure 3. File Tab, New Document Options, From Image File(s)
The Image To PDF dialog box will open:
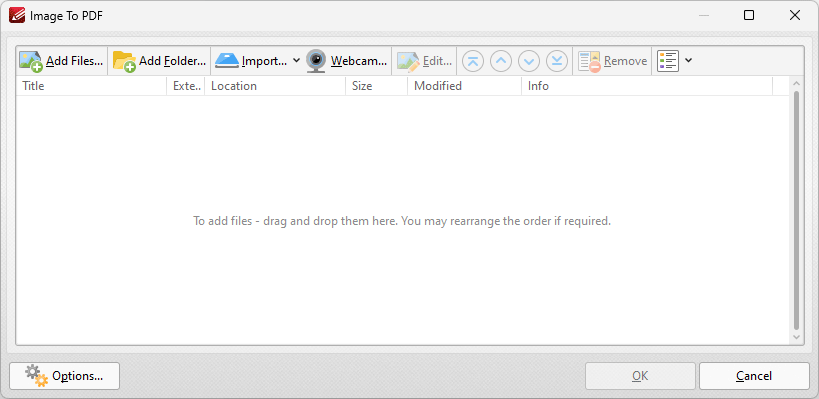
Figure 4. Image to PDF Dialog Box
•Click Add Files to select files from the local computer to add to the list of source files.
•Click Add Folder to add entire folders to the list of source files.
•Click Import to add images from the local scanner. The Scan Properties dialog box will open. Select the desired parameters as detailed here and click Scan to import images.
•Click Webcam to add images from the local webcam. The Image from Webcam dialog box will open. Click the camera button to take a picture, then apply the crop as desired and click Next to add the image to the Image to PDF dialog box.
•When images have been added to the dialog box, select them and then click Edit to edit them before they are combined with the other documents.
•Click the arrow icons to move images up or down in the list. Click the Remove icon to remove selected images from the list. The format in which files are shown within the list can be adjusted using the icon on the far right.
•Click Options for further options, as detailed here.
3. Click OK to create the new document.
Combine Files into a Single PDF
1. Click the File tab.
2. Click New Document, then click Combine Files into a Single PDF:

Figure 5. File Tab, New Document Options, Combine Files into a Single PDF
The Combine Files dialog box will open:

Figure 6. Combine Files Dialog Box
•Click Add Files to select files from the local computer to add to the list of source files. Click the dropdown arrow for additional options:
•Click Add All Opened Documents in Opened Order to add all open documents in the order in which they were opened.
•Click Add All Opened Documents in the Current Tab Order to add all open documents in their current order in the document tab.
•Click Add Folder to add entire folders to the list of source files. Click the arrow adjacent to the button to determine further options. The Add Files From Folder Options dialog box will open, as detailed below.
•Click Files List to Save/Load a list of files to use with this feature.
•Click Pages Range to determine the page range of selected documents. Page range settings are explained here.
•Use the arrow icons to reorder selected documents in the list. This determines the order in which they appear in the new document.
•Click Options to determine the actions taken with objects contained within combined files. The Options dialog box will open. The available actions relate to comments, form fields and bookmarks. Select the Add root bookmark with file name box as desired.

Figure 7. Add Files From Folder Options Dialog Box
•Select the Ask for suitable file extensions after choosing a source folder box to launch this dialog box when folders are selected using the Add Folder button.
•Select the Include Subfolders box to include subfolders of the parent folder when the software searches for files to add to the list of source files.
•Select the Select file types which should be added while searching folders box to determine file types to be included when the software performs a search.
•Custom filters can be added using the Add Custom Filter option. This facilitates the creation of custom profiles for subsequent use that search for specific file extensions. Click Add Custom Filter to open the Add Custom Filter dialog box:
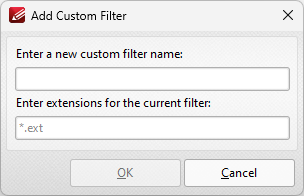
Figure 8. Add Custom Filter Dialog Box
•Enter a name for the custom filter.
•Enter the desired file extensions. File extensions must begin with an asterisk and a period, for example: *.apm, *.bmp.
•When the desired details have been entered, click OK to save the custom filter.
3. When you have selected the desired parameters, click OK in the Combine Files dialog box to create the new document.
Create a PDF Portfolio File
PDF portfolio files are a unique format of PDF file in which multiple files are assembled into an integrated PDF unit for convenience of use. Follow the steps below to create a PDF portfolio file:
1. Click the File tab.
2. Click New Document, then click PDF Portfolio:
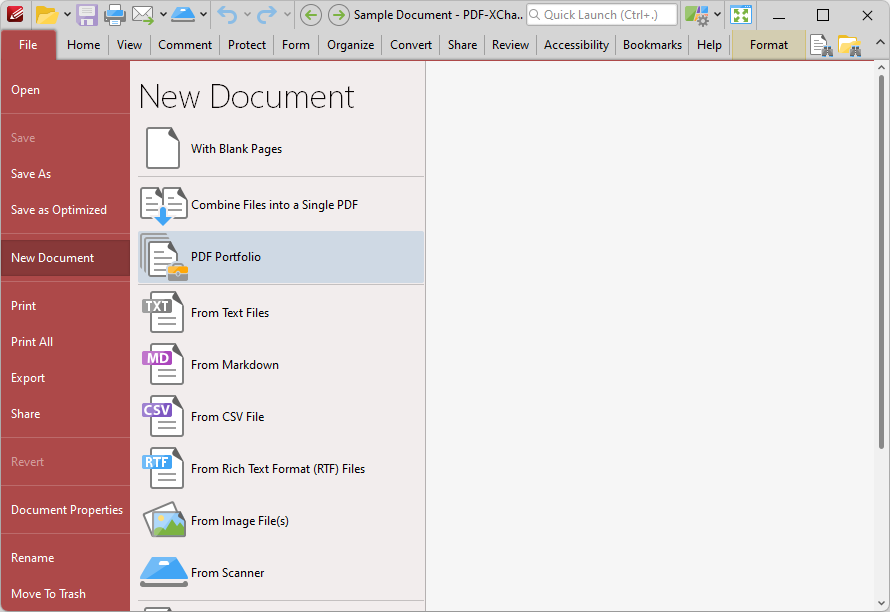
Figure 9. File Tab Submenu, New Document Options, PDF Portfolio
The Create PDF Portfolio dialog box will open:
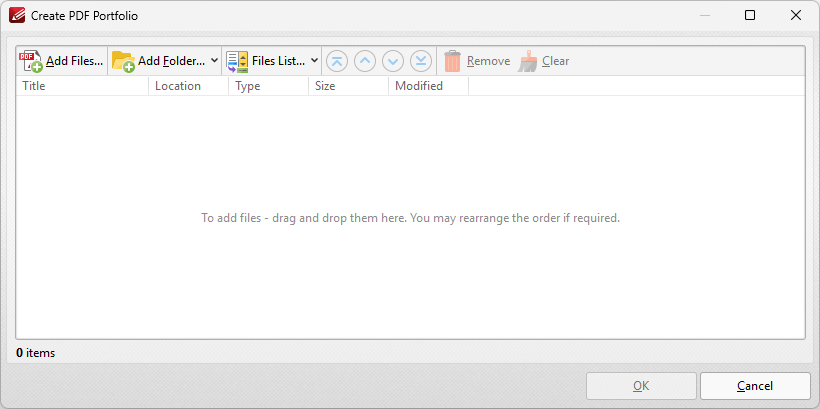
Figure 10. Create PDF Portfolio Dialog Box
•Click Add Files to select files from the local computer to add to the portfolio file.
•Click Add Folder to add entire folders to the list of source files used to create the portfolio file. Click the arrow adjacent to the button to determine further options. The Add Files From Folder Options dialog box will open. This is detailed in (figure 11).
•Click Files List to Save/Load a list of files to use with this feature.
•Use the arrow icons to reorder selected documents in the list. This determines the order in which they appear in the portfolio file.
3. When all desired files have been added in the dialog box, click OK to create the PDF portfolio file.
Figure 11. Add Files From Folder Options Dialog Box
•Select the Ask for suitable file extensions after choosing a source folder box to launch this dialog box when folders are selected using the Add Folder button.
•Select the Include Subfolders box to include subfolders of the parent folder when the software searches for files to add to the list of source files.
•Select the Select file types which should be added while searching folders box to determine file types to be included when the software performs a search.
•Custom filters can be added using the Add Custom Filter option. This facilitates the creation of custom profiles for subsequent use that search for specific file extensions. Click Add Custom Filter to open the Add Custom Filter dialog box:
Figure 12. Add Custom Filter Dialog Box
•Enter a name for the custom filter.
•Enter the desired file extensions. File extensions must begin with an asterisk and a period, for example: *.apm, *.bmp.
•When the desired details have been entered, click OK to save the custom filter.
Create a PDF Document from a Text File
1. Click the File tab.
2. Click New Document, then click From Text Files:
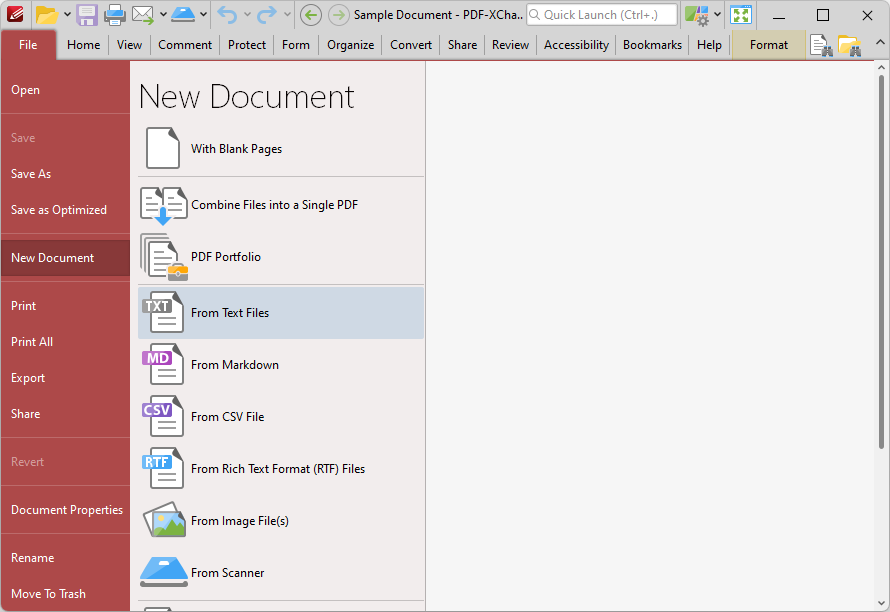
Figure 13. File Tab, New Document Options, From Text Files
The Convert Text Files to PDF dialog box will open:
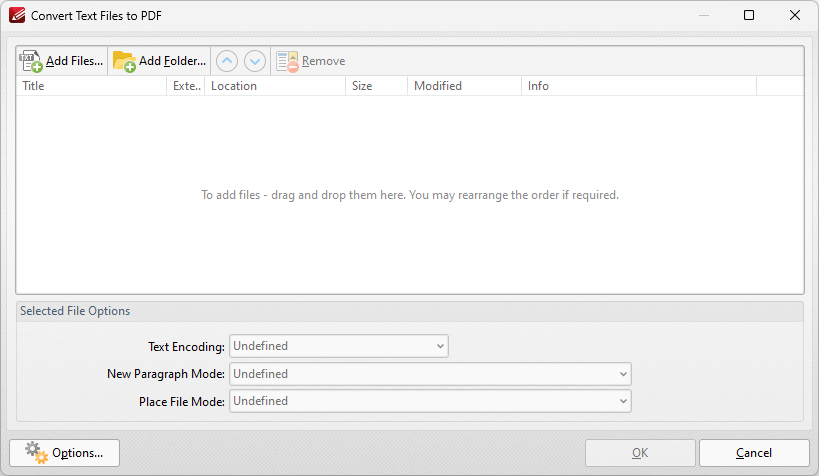
Figure 14. Convert Text Files to PDF Dialog Box
•Click Add Files to select files from the local computer to add to the list of source files.
•Click Add Folder to add entire folders to the list of source files. Click the arrow adjacent to the button to determine further options. The Add Files From Folder Options dialog box will open, as detailed below.
•Use the arrow icons to reorder selected documents in the list. This determines the order in which they appear in the new document.
•Click Options to determine the actions taken with objects contained within combined files. The Options dialog box will open. The available actions relate to comments, form fields and bookmarks. Select the Add root bookmark with file name box as desired.
Figure 15. Add Files From Folder Options Dialog Box
•Select the Ask for suitable file extensions after choosing a source folder box to launch this dialog box when folders are selected using the Add Folder button.
•Select the Include Subfolders box to include subfolders of the parent folder when the software searches for files to add to the list of source files.
•Select the Select file types which should be added while searching folders box to determine file types to be included when the software performs a search.
•Custom filters can be added using the Add Custom Filter option. This facilitates the creation of custom profiles for subsequent use that search for specific file extensions. Click Add Custom Filter to open the Add Custom Filter dialog box:
Figure 16. Add Custom Filter Dialog Box
•Enter a name for the custom filter.
•Enter the desired file extensions. File extensions must begin with an asterisk and a period, for example: *.apm, *.bmp.
•When the desired details have been entered, click OK to save the custom filter.
3. When you have selected the desired parameters, click OK in the Combine Files dialog box to create the new document.
Create a PDF Document from a Markdown File
1. Click the File tab.
2. Click New Document, then click From Markdown:
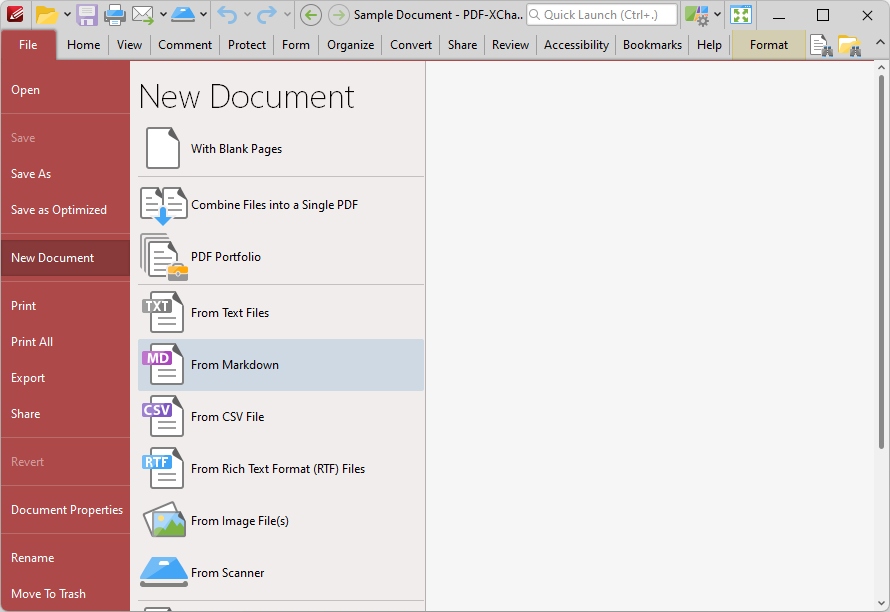
Figure 17. File Tab, New Document Options, From Markdown
The Convert Markdown to PDF dialog box will open:
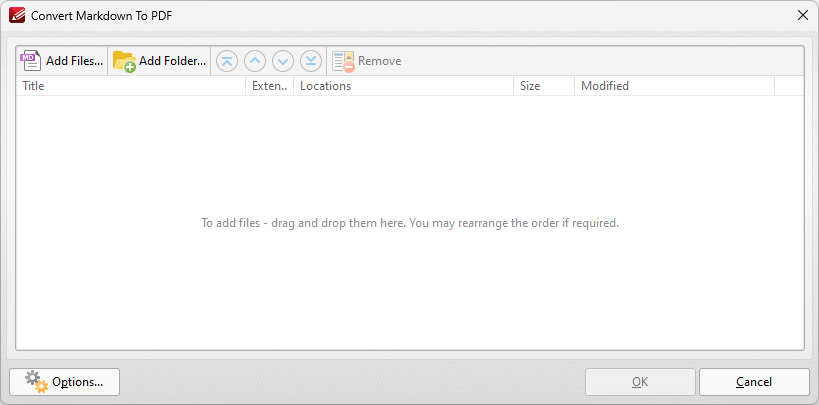
Figure 18. Convert Markdown to PDF Dialog Box
•Click Add Files to select files from the local computer to add to the list of source files. Click the dropdown arrow for additional options:
•Click Add Folder to add entire folders to the list of source files.
•Use the arrow icons to reorder selected documents in the list. This determines the order in which they appear in the new document.
•Click Options to determine conversion options. The Markdown to PDF Options dialog box will open:
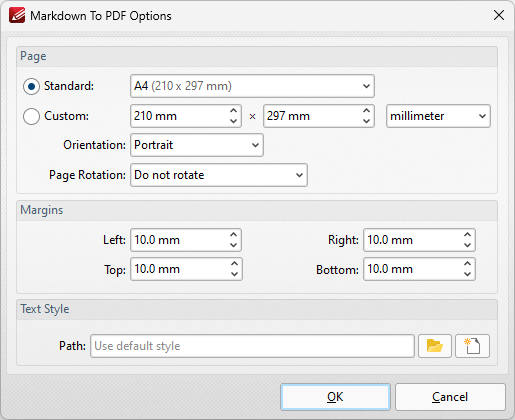
Figure 19. Markdown to PDF Options Dialog Box
•Use the Standard dropdown menu to set a standard document size for the dimensions of the new document.
•Click the Custom button to set a custom document size for the dimensions of the new document, then use the number boxes and the units of measurement dropdown menu to determine the dimensions.
•Use the Orientation and Page Rotation dropdown menus to set the orientation and page rotation of the new document.
•Use the Margins dropdown menus to determine the margins of the new document.
•Use the Path text box to determine the text style/presentation of the new document. Note that it is necessary to use a (*.css) file to determine these options. Further information about this file format is available here.
Create a PDF Document from a CSV File
1. Click the File tab.
2. Click New Document, then click From CSV File:
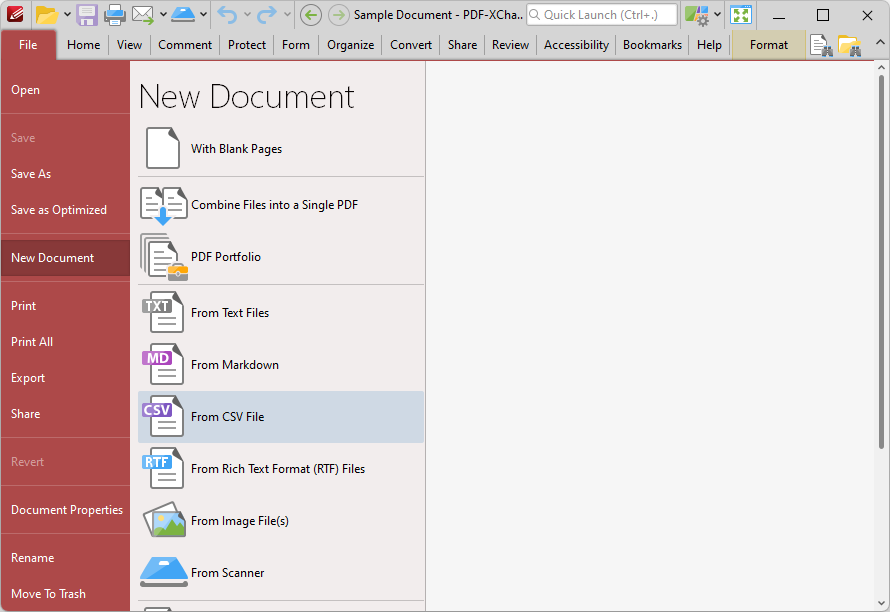
Figure 20. File Tab, New Document Options, From CSV File
The Open Files dialog box will open.
3. Select the desired file and click Open. The CSV to PDF dialog box will open:
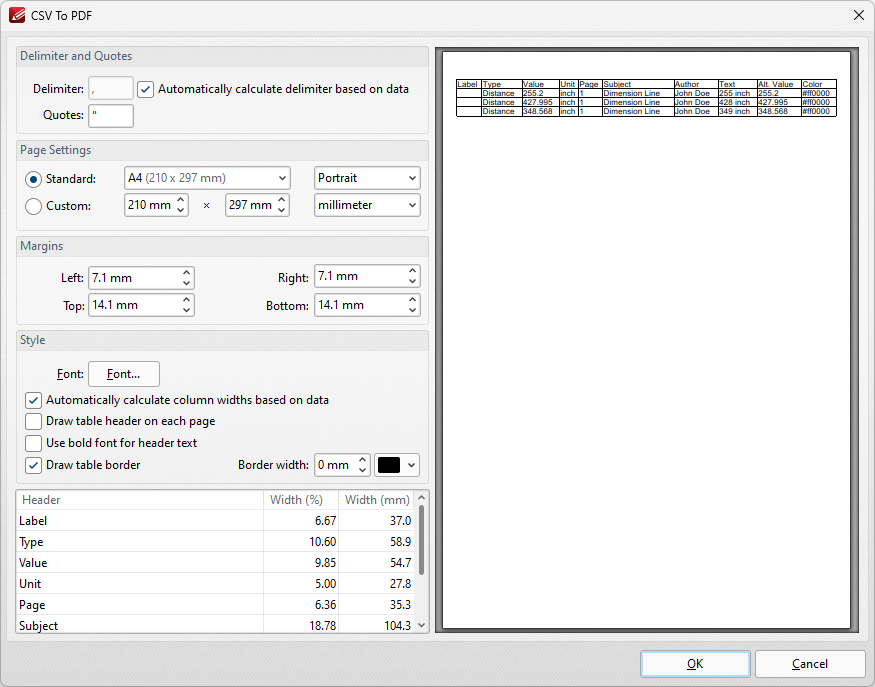
Figure 21. CSV to PDF Dialog Box
•Use the Delimiter box to specify the delimiter used in the input file to separate values, or select the adjacent check box to perform this operation automatically.
•Use the Quotes box to specify the character used to determine quotes in the input file.
•Select an option in the Standard dropdown menu to specify the page size of the output document, or use the Custom options to specify a custom page size.
•Use the orientation and units of measurement dropdown menus to specify the orientation and units of measurement used for the output document.
•Use the Margins number boxes to specify the margins of the output document.
•Click Font to determine font options for the output document, as detailed in (figure 22) below.
•Select the Automatically calculate column widths based on data box to calculate column widths according to the data in the source document.
•Select the Draw table header on each page and/or Use bold font for header text boxes as desired.
•Select the Draw table border box as desired, and use the Border width and color dropdown menus to determine the border width and color used for the table border.
4. When you have determined the settings as desired, click OK to convert the CSV file to PDF.
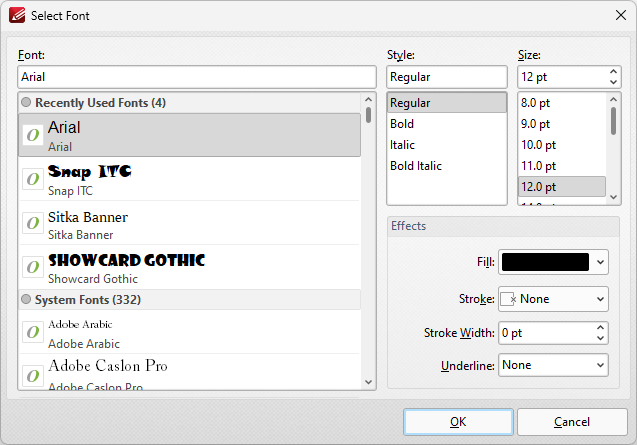
Figure 22. Select Font Dialog Box
•Use the Font text box to enter the name of the desired font, or select one from the options listed below the text box.
•Use the Style menu to determine the style of the font.
•Use the Size menu to determine the size of the font.
•Use the Fill menu to determine the color of the font.
•Use the Stroke menu to determine the color of the stroke. This color will border the text.
•Use the Stroke width menu to determine the size of the stroke.
•Use the Underline menu to enable/disable font underline.
Create a PDF Document from a Scanned Document
1. Click the File tab.
2. Click New Document, then click From Scanner.
The following options are then available:
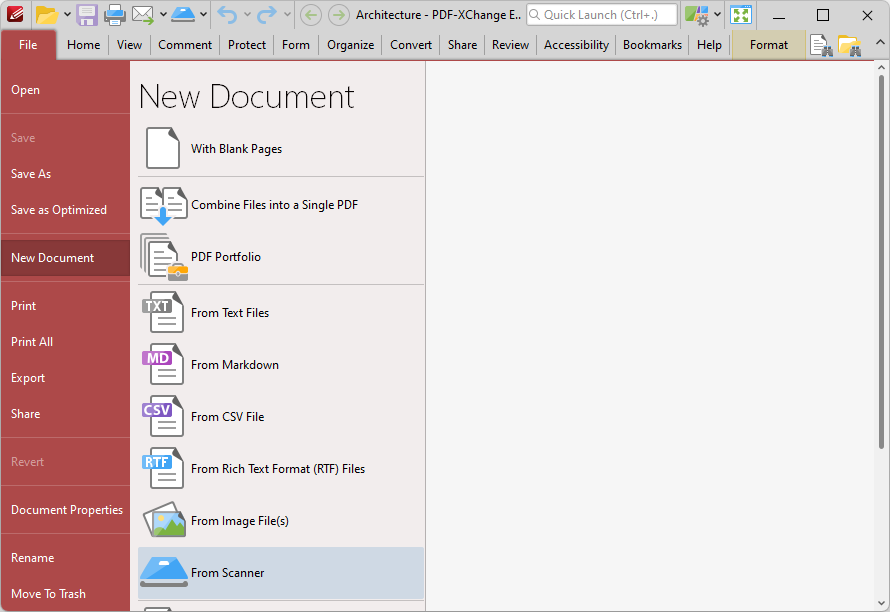
Figure 23. File Tab, New Document From Scanner Options
3. Select a preset mode as desired, or click Custom Scan to set custom parameters. The Scan Properties dialog box will open:
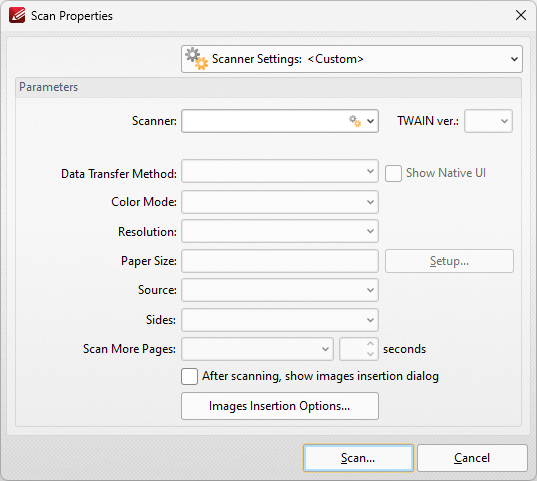
Figure 24. Scan Properties Dialog Box
•Click the Scanner Settings menu to select a preset scanning mode.
•Click the Scanner menu to select a scanner to use.
•Click the Data Transfer Method menu to select either Native Mode or Memory Mode:
•Native Mode uses a single memory buffer. This is the default and fastest mode, and is compatible with the broadest range of scanners.
•Memory Mode enables the use of multiple memory buffers. This is a useful function in cases where memory is low and/or when large images are being scanned.
•The Show Native UI box is selected by default, which means the user interface of the device driver is used. This is the most reliable option, and the scanner will select certain parameters of the scan itself: Color Mode, Resolution, Paper Size and Source. Clear the Show Native UI box to customize these options:
•Color Mode has four options: Auto detect, Color, Grayscale and Black & White. These refer to the format of scanned documents.
•Click the Resolution menu to select the dpi (dots per inch) of scanned documents.
•Paper Size refers to the size of the paper used when scanning. Click Setup for further options, which are as follows:
•The Automatic option determines the paper size automatically.
•The Standard option contains standard sizes such as those used by the ISO and ANSI.
•The Custom option can be used to enter custom dimensions.
•Source has three options Auto, Flatbed and Feeder. These refer to the type of scanner being used.
•Click the Sides menu to determine which sides of documents are scanned. There are three options: Simple Scan, Manual Duplex and Manual Duplex Reversed. Click the arrow for an explanation of these options.
•Click the Scan More Pages menu to select the setting for when additional pages are scanned.
•Select the After scanning, show images insertion dialog box to view the images insertion dialog box after the scan has taken place. This enables the customization of images and images settings.
•Click the Images Insertion Options button to determine further options for inserted images. Those options are explained here.
4. When you have selected the desired parameters, click OK to scan the document to PDF.
Create a PDF Document from an RTF File
1. Click the File tab.
2. Click New Document, then click From Rich Text Format (RTF) Files:
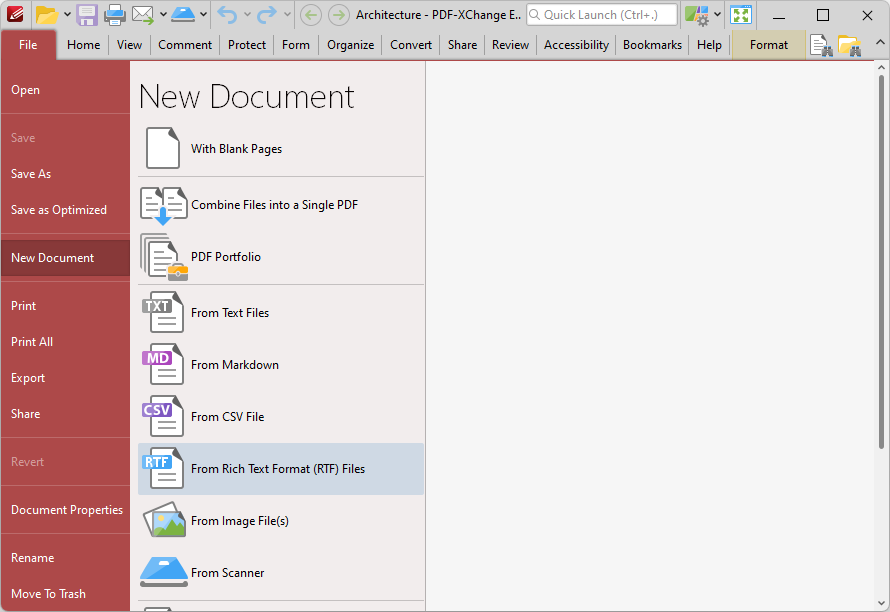
Figure 25. File Tab, New Document From Rich Text Format
The Convert RTF Files To PDF dialog box will open:
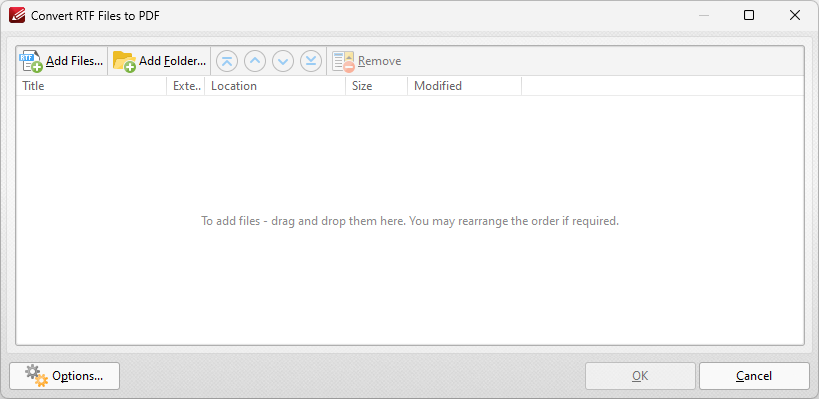
Figure 26. Convert RTF Files to PDF
•Click Add Files to select files from the local computer to add to the list of source files. Click the dropdown arrow for additional options:
•Click Add All Opened Documents in Opened Order to add all open documents in the order in which they were opened.
•Click Add All Opened Documents in the Current Tab Order to add all open documents in their current order in the document tab.
•Click Add Folder to add entire folders to the list of source files. Click the arrow adjacent to the button to determine further options. The Add Files From Folder Options dialog box will open, as detailed below.
•Click Page Range to determine the page range of selected documents. Page range settings are explained here.
•Use the arrow icons to reorder selected documents in the list. This determines the order in which they appear in the new document.
•Click Options to determine the actions taken with objects contained within combined files. The Options dialog box will open, as detailed in (figure 29) below.
Figure 27. Add Files From Folder Options Dialog Box
•Select the Ask for suitable file extensions after choosing a source folder box to launch this dialog box when folders are selected using the Add Folder button.
•Select the Include Subfolders box to include subfolders of the parent folder when the software searches for files to add to the list of source files.
•Select the Select file types which should be added while searching folders box to determine file types to be included when the software performs a search.
•Custom filters can be added using the Add Custom Filter option. This facilitates the creation of custom profiles for subsequent use that search for specific file extensions. Click Add Custom Filter to open the Add Custom Filter dialog box:
Figure 28. Add Custom Filter Dialog Box
•Enter a name for the custom filter.
•Enter the desired file extensions. File extensions must begin with an asterisk and a period, for example: *.apm, *.bmp.
•When the desired details have been entered, click OK to save the custom filter.
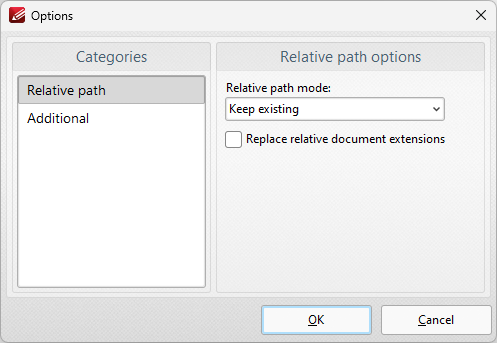
Figure 29. Convert RTF files to PDF Options
Relative path is the only option in the categories menu. There are four relative path options:
•Keep existing means relative paths remain as they are.
•Make absolute makes the relative paths absolute.
•Make relative makes the relative paths relative. (Absolute paths show the full name of the file/internet address in question. Relative paths are shorter and link to more specific locations).
•Select the Replace relative documents extensions box to create a PDF document from linked RTF files.
3. When you have selected the desired parameters, click OK in the Convert RTF Files to PDF dialog box to create the PDF.
Create a PDF Document from a Web Page
Click From Web Page to convert web pages into PDF:
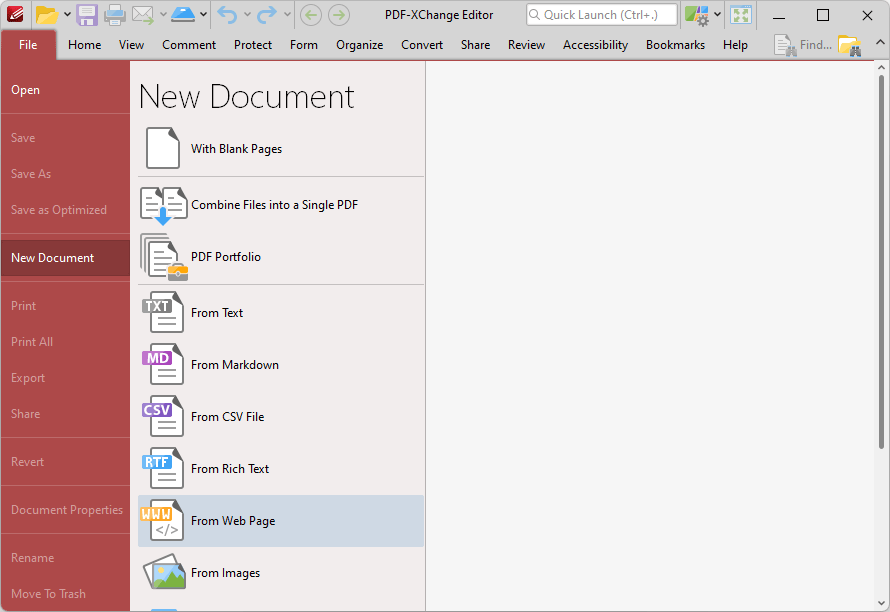
Figure 1. File Tab Submenu, New Document Options, From Web Page
The Create PDF from Web Page dialog box will open:
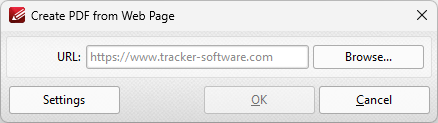
Figure 2. Create PDF from Web Page Dialog Box
•Enter the URL of the web page you want to convert to PDF, then click OK to perform the conversion.
•Click Browse to select a file on your machine to convert to PDF.
•Click Settings to view additional settings for converting web pages to PDF. The Html to PDF Options dialog box will open:
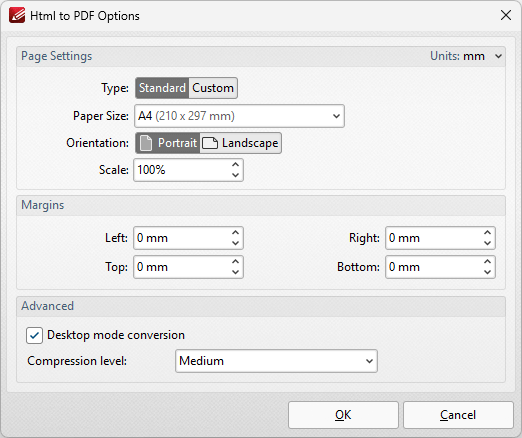
Figure 3. Html to PDF Options Dialog Box
•Select the Standard button to create a document using a standard size, then select the desired size from the dropdown menu.
•Select the Custom button to create a document using a custom size, then use the adjacent boxes to determine the size of the document.
•Use the Margins number boxes to specify the margins in the document.
•Use the Compression level dropdown menu to determine the level of compression used in the document.
Click OK to save settings.
Create a PDF Document from an Email
Click From Email to convert email files into PDF:
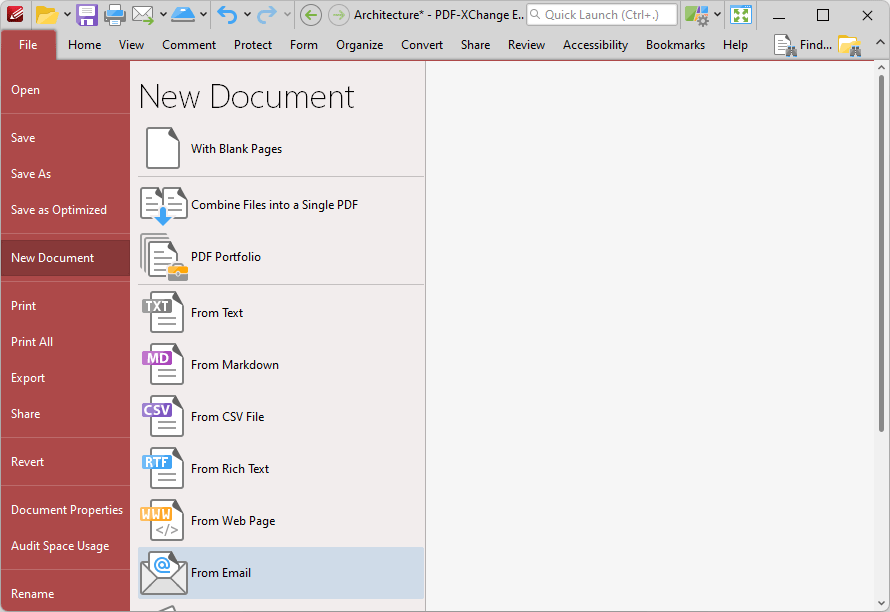
Figure 1. File Tab Submenu, New Document Options, From Email
The Convert Email Files to PDF dialog box will open:
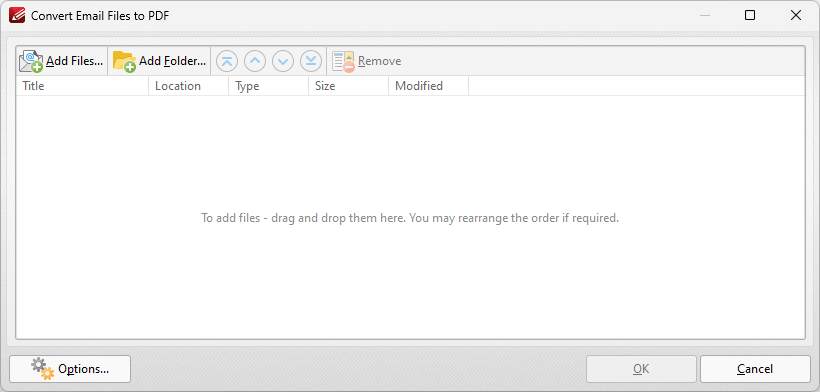
Figure 2. Convert Email Files to PDF Dialog Box
•Click Add Files to select files from the local computer to add to the list of source files.
•Click Add Folder to add entire folders to the list of source files.
•Use the arrow icons (or click and drag) to reorder selected documents in the list. This determines the order in which they appear in the new document.
•Click Options to determine document output options:
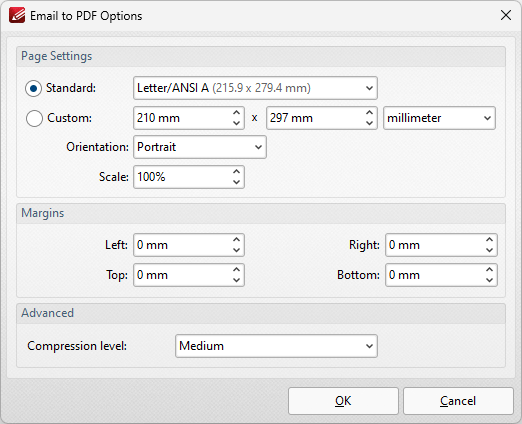
Figure 3. Email to PDF Options Dialog Box
•Select Standard to create a document using a standard ISO size, then select an option in the dropdown menu.
•Select Custom to create a custom document, then enter the desired dimensions in the number boxes and units of measurement dropdown menu.
•Use the Orientation and Scale boxes to determine the orientation and scale of the document as desired.
•Use the Margins number boxes to determine the margins for the document.
•Use the Compression dropdown menu to determine the compression used for the the document.
Click OK to create the document.
Create a PDF Document from Clipboard Content
1. Click the File tab.
2. Click New Document, then click From Clipboard:

Figure 30. File Tab, New Document From Clipboard
The Create New Document from Clipboard dialog box will open:
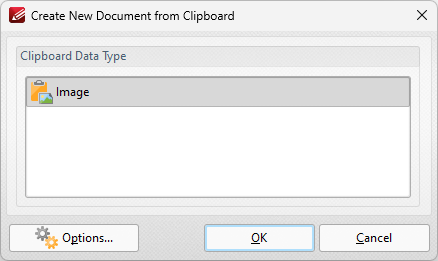
Figure 31. Create New Document from Clipboard Dialog Box
Select the type of content that you want to use to create the new document, then click OK to create the document.
If you are creating a new document from an image, then you can click the Options button to determine conversion options. The Image to PDF Options dialog box will open, and can be used to determine conversion options as detailed above in (figure 4).
If you are creating a new document from text, then you can click the Options button to determine conversion options. The Options dialog box will open, and can be used to determine conversion options as detailed above in (figure 13).
Create PDF Documents from MS Office Applications
If you are using PDF-XChange Editor as part of the PDF-XChange PRO bundle, or you have purchased a license for the PDF-XChange Standard printer, then you can also create documents via the MS Office Toolbar Add-in. This toolbar add-in installs automatically when you purchase PDF-XChange Standard and is visible in the main window of MS Office applications. Click the PDF-XChange tab to view options:
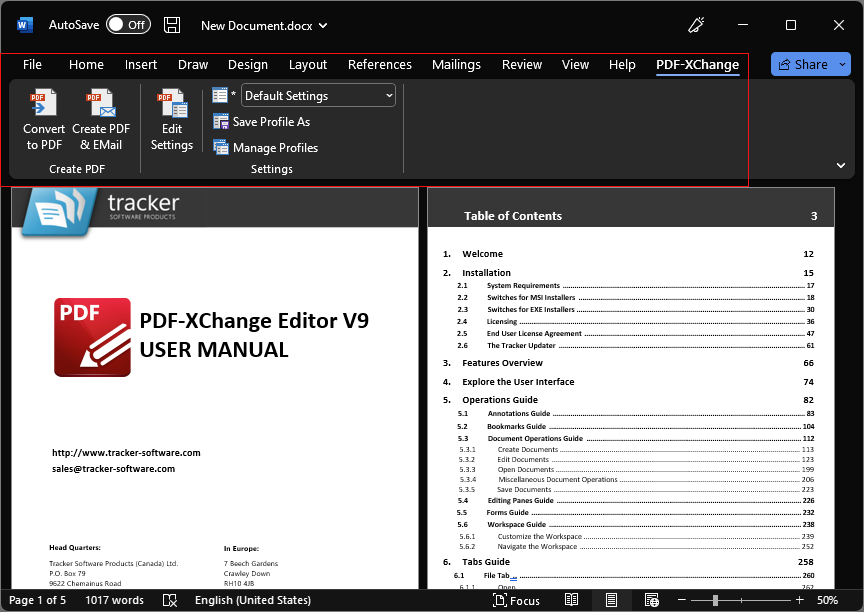
Figure 32. MSOffice Toolbar Add-in Options, MS Word
•Click Convert to PDF to convert the active document to PDF.
•Click Create PDF & Email to convert the active document to PDF and email it.
•Click Edit Settings to view/edit the PDF-XChange Standard settings.
•Use the dropdown menu to determine the printing profile used to print documents.
•Click Save Profile As to save the current settings to a new profile.
•Click Manage Profiles to manage existing profiles.
Further information on the PDF-XChange Standard printer is available in the online manual here.