 Adding Watermarks to PDFs
Watermarks are text or images that appear in front of or behind document content. Watermarks can be used for a range of purposes, such as adding the owner's name to photographic content or indicating that a document is a confidential. It is possible to add multiple watermarks to the same document, and you can add the same watermark to multiple pages at the same time, but you must add each watermark separately. Click the Organize tab, then click Watermarks and click Add to add a watermark to the current document:

Figure 1. Organize Tab, Watermarks Dropdown Menu, Add Watermark Selected
The Add Watermark dialog box will open:
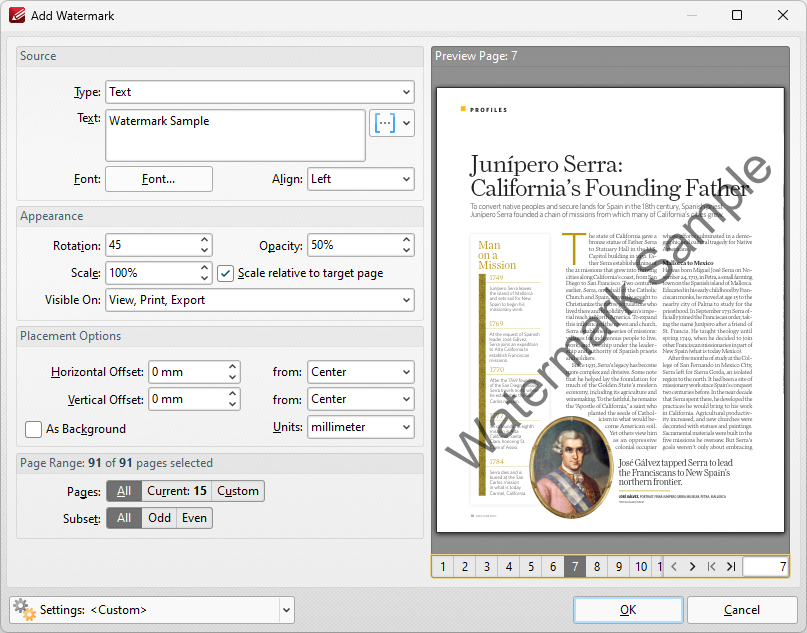
Figure 2. Add Watermark Dialog Box
•The Source options determine the source of watermarks. Enter text into the box or select a file. Use the font, macro and alignment options to customize watermarks when text is used.
•The Appearance options determine the rotation, opacity and scale of the watermark:
•The Rotation value determines the rotation (in degrees) of watermarks.
•The Opacity value determines the opacity (transparency) of watermarks.
•The Scale value determines the scale of watermarks. Select the check box to scale watermarks to the target page. If this box is not selected then the scale is relative to the size of the original image used as the source for the watermark.
•The Placement options determine the horizontal and/or vertical offset of the watermark from the left, right or center of the document.
•Select the As Background box to insert watermarks into the background as opposed to the foreground of documents.
•The Page Range options are as follows:
•Select All to add watermarks to all pages.
•Select Current Page to add a watermark to only the current page.
•Use the Pages box to determine watermarks for specific page ranges. Further information on this process is available here.
•Use the Subset option to select All Pages, Odd Pages Only or Even Pages Only.
•The Preview Page pane displays a preview of pages. Select the numbers beneath the pane to preview the corresponding document pages.
•The Settings menu features two predefined watermarks: Draft and Confidential. The remaining options relate to customized settings:
•Click Save to save settings.
•Click Delete to remove settings.
•Click Manage to manage settings.
Click OK to add watermarks.
Removing All Watermarks
If you want to remove all watermarks from the current document, then click the Organize tab, click the Watermarks dropdown menu and then click Remove All:

Figure 3. Organize Tab, Watermarks Dropdown Menu, Remove All Highlighted
Managing Watermarks
If you want to manage current watermarks, then click the Organize tab, click the Watermarks dropdown menu and then click Manage:

Figure 4. Organize Tab, Background Dropdown Menu, Manage Highlighted
The Manage Watermarks dialog box will open:
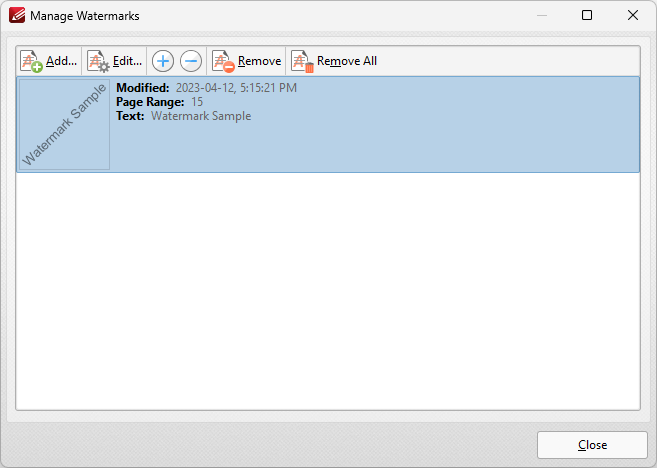
Figure 5. Manage Backgrounds Dialog Box
•Click Add to add a new watermark to the document, as detailed above.
•Click Edit to edit the watermark currently selected in the Manage Background dialog box.
•Click the plus/minus buttons to zoom in on/out from watermarks.
•Click Remove to remove the watermark currently selected.
•Click Remove All to remove all watermarks from the document.