 Editing Forms
Right-click forms to open the forms shortcut menu, which is used to edit and manipulate form fields:
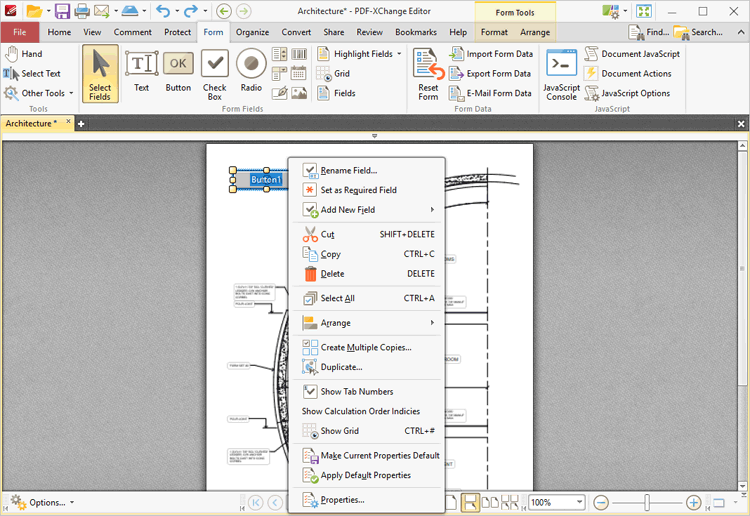
Figure 1. Forms Shortcut Menu
•Click Rename Field to rename selected fields.
•Click Set as Required Field to designate selected field as required, which means it must be filled before the document can be submitted. These fields will also be highlighted when the Highlight Required Fields Only option outlined here is enabled.
•Click Add New Field to add new form fields to documents.
•Click Cut, Copy or Delete to cut/copy/delete selected forms.
•Click Select All to select all form fields.
•Click Arrange to arrange fields. This option is available only when multiple fields are selected. If the fields were group-selected with the mouse, then the first field placed in the document is used as the reference point to arrange the other fields. If the form fields were group-selected by holding Ctrl and selecting fields one at a time, then the first field selected will be used as the reference point. The Arrange options are detailed below:
•Align Left Edges
•Align Horizontal Centers
•Align Right Edges
•Align Top Edges
•Align Vertical Centers
•Align Bottom Edges
•Distribute Horizontally
•Distribute Vertically
•Make Same Width
•Make Same Height
•Make Same Size
•Bring Forward, which brings the selected field up a step in cases where multiple forms overlap.
•Send Backward, which sends the selected field back a step in cases where multiple forms overlap.
•Bring to Front, which brings the selected field to the top in cases where multiple forms overlap.
•Send to Back, which sends the selected field to the back in cases where multiple forms overlap.
•Click Create Multiple Copies to create copies of selected forms, as detailed below.
•Click Duplicate to duplicate selected forms to a specific page range, as detailed below.
•Click Show Tab Numbers to display automated tab numbers in each form field. These numbers represent the tab order when the Tab key is used to navigate between forms.
•Click Show Grid to activate the grid feature, which displays in the background of documents and assists in the placement of objects.
•Click Make Current Properties Default to set the properties of the form field currently selected as the default properties for all subsequent forms of the same format.
•Click Apply Default Properties to apply the default properties to the selected form field.
•Click Properties to launch the Properties pane, which can be used to view/edit the properties of selected fields.
Create Multiple Copies of Form Fields
Follow the steps below to create multiple copies of form fields:
1. Click the Form tab, then click Select Fields and select the form fields to be copied:
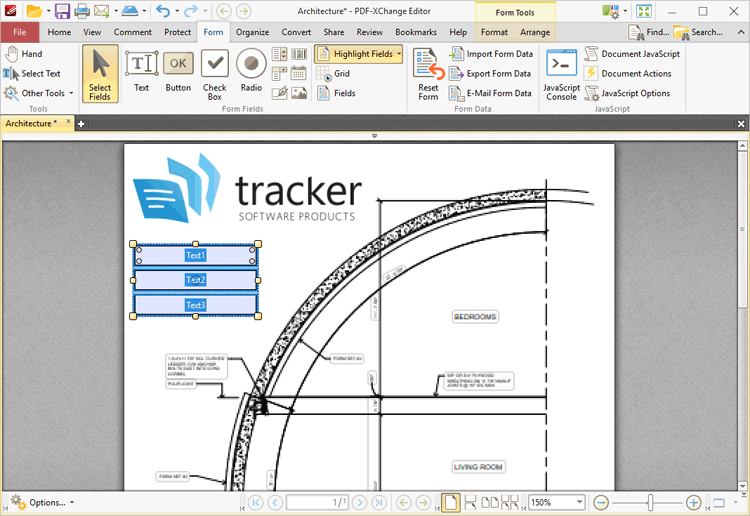
Figure 2. Form Tab, Select Fields Enabled, Forms Selected
2. Click the Format tab, then click Create Multiple Copies:
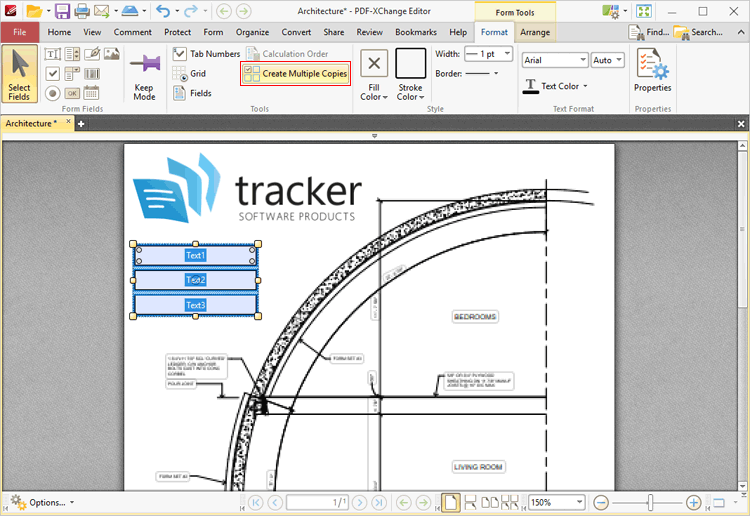
Figure 3. Format Tab, Create Multiple Copies
The Create Multiple Copies of Fields dialog box will open:
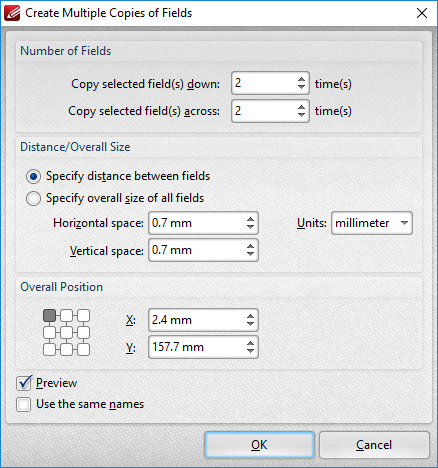
Figure 4. Create Multiple Copies of Files Dialog Box
•The figure entered in the the Copy selected fields down number box determines the amount of copies placed vertically below source fields.
•The figure entered in the the Copy selected fields across number box determines the amount of copies placed horizontally from source fields.
•Select Specify distance between fields to determine the distance between copies. Enter the desired distances in the Horizontal space and Vertical space number boxes.
•Select a unit of measurement from the Units menu.
•Select Specify overall size of all fields to determine the size of the area in which fields are multiplied. The value entered in the Overall width and Overall height number boxes determines the overall width and height of the area in which the selected field is multiplied. Select the desired units of measurement from the Units menu.
•The Overall Position settings can be used to determine the overall position of copied fields. Edit the X and Y values as desired. The position selected in the grid determines the starting point for measurements when multiple copies of form fields are created.
•Select the Preview box to place a preview before the creation of copied fields.
•Select the Use the same names box as desired. This is useful for fields that require the same user data or other elements such as the current date. Copies will feature the same name as source fields, followed by a unique number.
Duplicate Form Fields
Follow the steps below to duplicate form fields:
1. Click the Form tab, then click Select Fields and select the form fields to be copied:
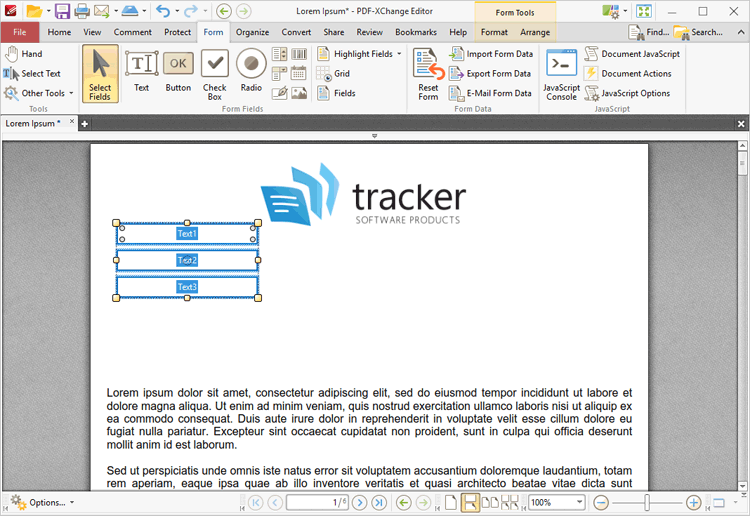
Figure 5. Selected Fields
2. Right click the fields and then click Duplicate:
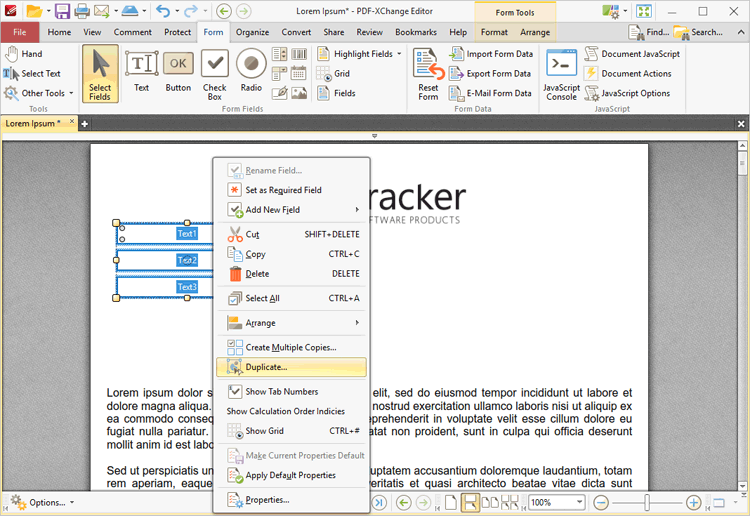
Figure 6. Right-Click Shortcut Menu, Duplicate
The Duplicate Annotations dialog box will open:
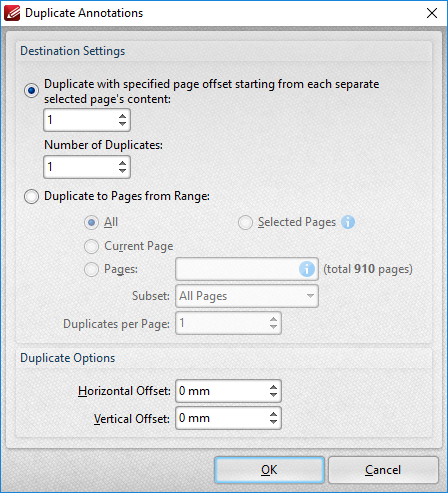
Figure 6. Duplicate Annotations Dialog Box
•Use the Destination Settings to determine the output settings for duplicated forms:
•Select the upper option button to duplicate forms through a specified page offset from the source form. Enter the desired page offset in the upper number box and the number of duplicates in the lower number box. For example, if the page offset is specified as '3' and the number of duplicates is specified as '3', then three duplicates will be created, with one placed on every third page starting from the source form.
•Select the lower option button to duplicate forms to a specified page range:
•Click All to select all document pages.
•Click Current Page to duplicate the form on only the current page.
•Click Pages to determine a page range. See here for page range options.
•Use the Subset option to select All Pages, Odd Pages Only or Even Pages Only for page ranges.
•Use the Duplicates per Page number box to specify the number of duplicate forms created per page.
•Use the Duplicate Options settings to determine the duplication of selected forms:
•The value entered in the Horizontal Offset number box determines the horizontal offset from the duplicated field.
•The value entered in the Vertical Offset number box determines the vertical offset from the duplicated field.
Tab Order of Forms
Please note that the Tab key can be used to scroll through text field forms after they have been added to documents. Follow the steps below to change the tab order of forms:
1. Click the View tab.
2. Click the Panes dropdown menu, then click Fields. The Fields pane will open.
3. Click Options. The Options submenu will open.
4. Click Order by Pages, then click and drag fields within the Fields pane to change the tab order.
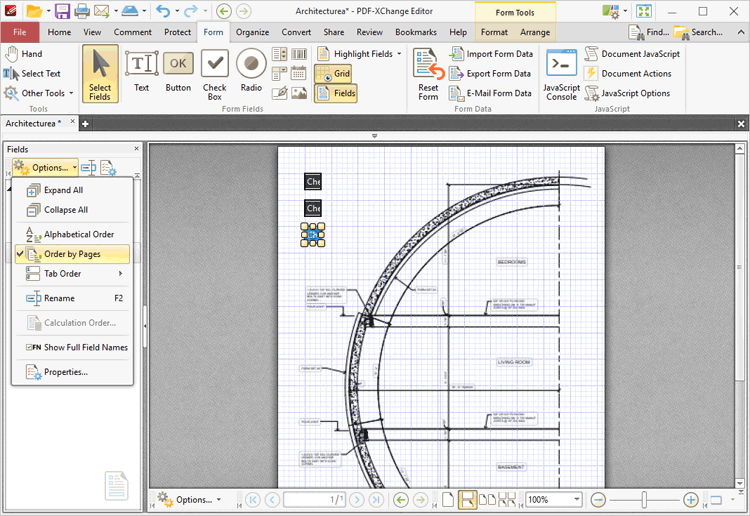
Figure 7. Fields Pane, Tab Order Submenu