 Editing Scanned Documents
When you create PDF documents from a scanner, they are automatically converted from image format to PDF format. PDF documents created in this manner therefore contain only images, and can be edited using the image-editing options detailed here. If you have scanned a text-based document and want to edit the text, then it is necessary to perform OCR (optical character recognition) on the document and manipulate the text in order to make it editable.
Note that two OCR engines are available in PDF-XChange Editor - the default OCR engine, which is available to all users, and the Enhanced OCR engine, which is available only with a PDF-XChange Editor Plus license. The Enhanced OCR engine is significantly faster and more accurate than the default OCR engine and it contains several extra features, including the direct conversion of image-based text to standard text. The default OCR engine in PDF-XChange Editor recognizes text in image-based documents and then inserts an invisible layer of duplicate text over it, which makes the image-based text searchable and selectable. Follow the steps below to create PDF documents from scanned documents and then convert the image-based text into editable text:
1. Click the File tab, then click New Document and click From Scanner:
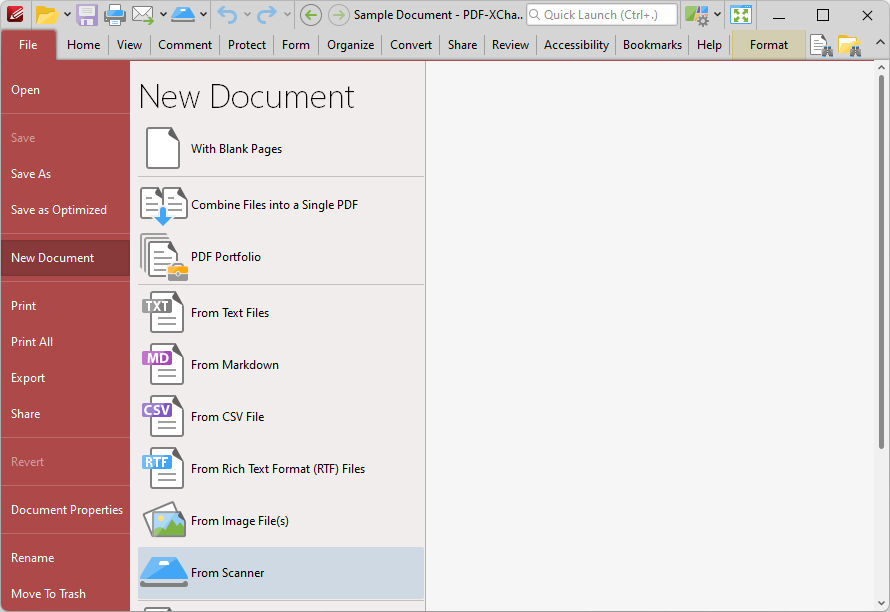
Figure 1. File Tab, New Document Options
2. Select a predefined scanning mode from the list, or click Custom Scan to set up a custom scan. If you select to use a custom scan, then the Scan Properties dialog box will open:
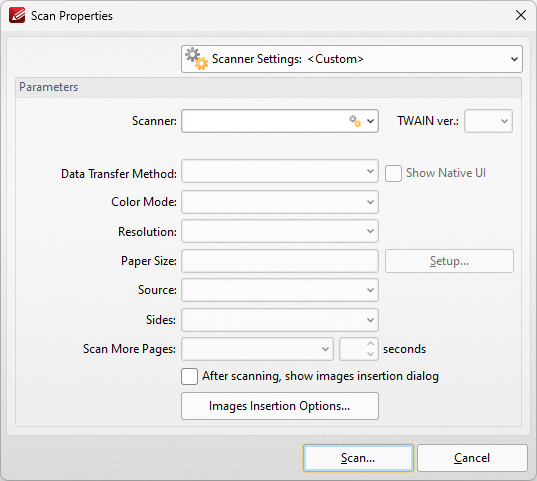
Figure 2. Scan Properties Dialog Box
3. Set up the scan parameters as detailed here, then click Scan to scan the document to PDF.
The new document will open in PDF-XChange Editor.
4. Click the Convert tab, then click OCR Pages:
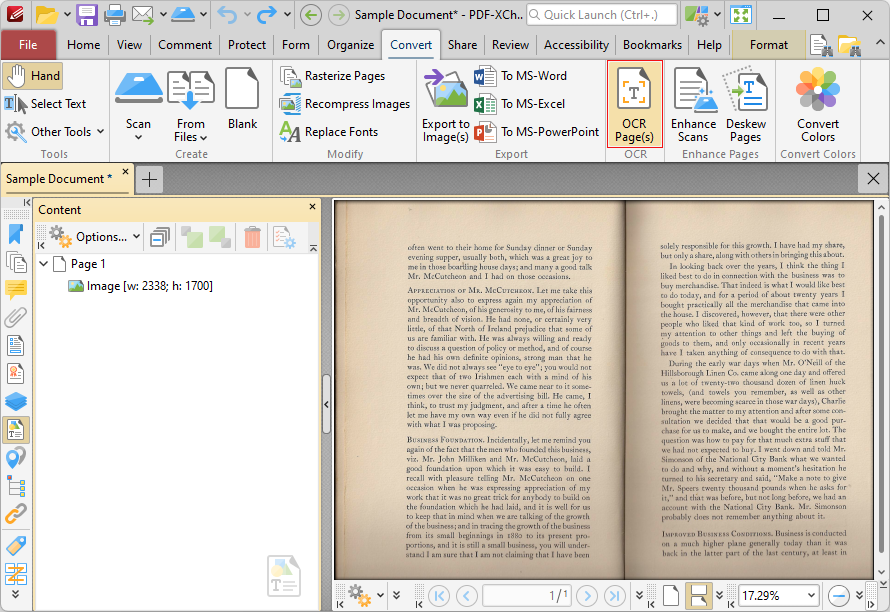
Figure 3. Convert Tab, OCR Pages Highlighted
The OCR Pages dialog box will open:
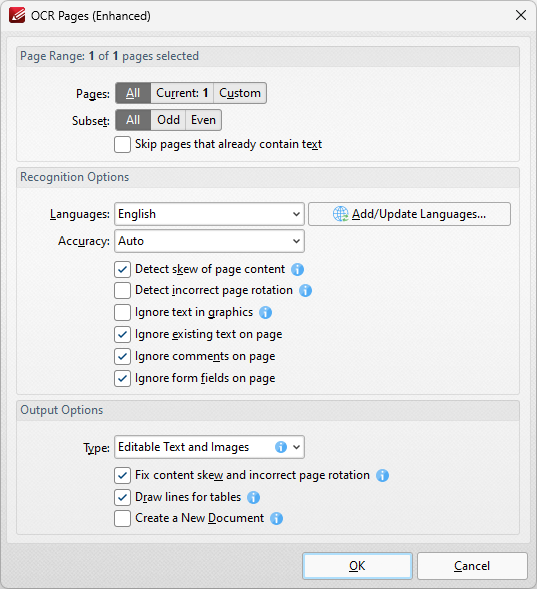
Figure 4. OCR Pages Dialog Box
5. Determine parameters as detailed here, then click OK to perform OCR on the document.
6. Click the View tab, then click the Panes dropdown menu and click Content:
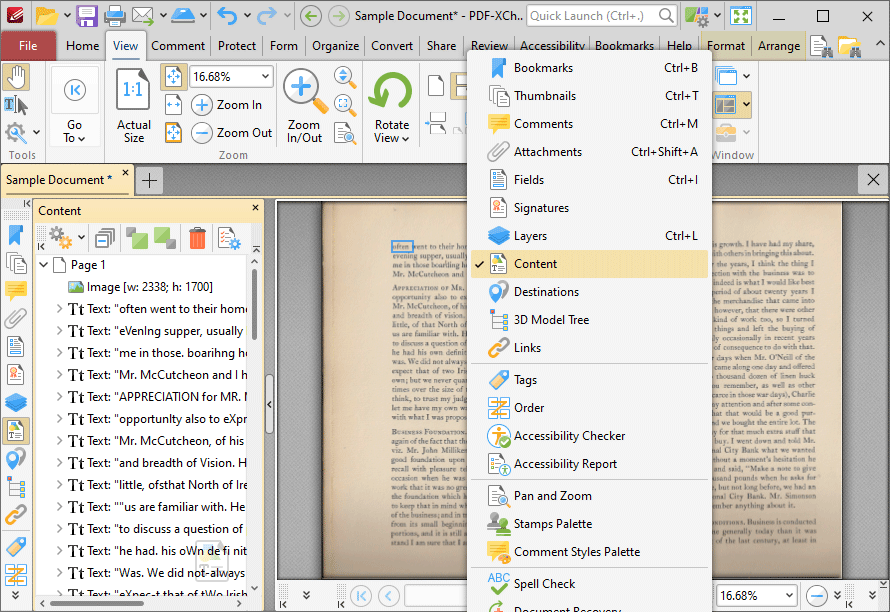
Figure 5. View Tab, Panes Dropdown Menu, Content Highlighted
7. Click the dropdown arrow of the page that contains the text you want to edit, then group-select the text-based elements of the page in the Content pane. The corresponding text layer will be highlighted in the document:
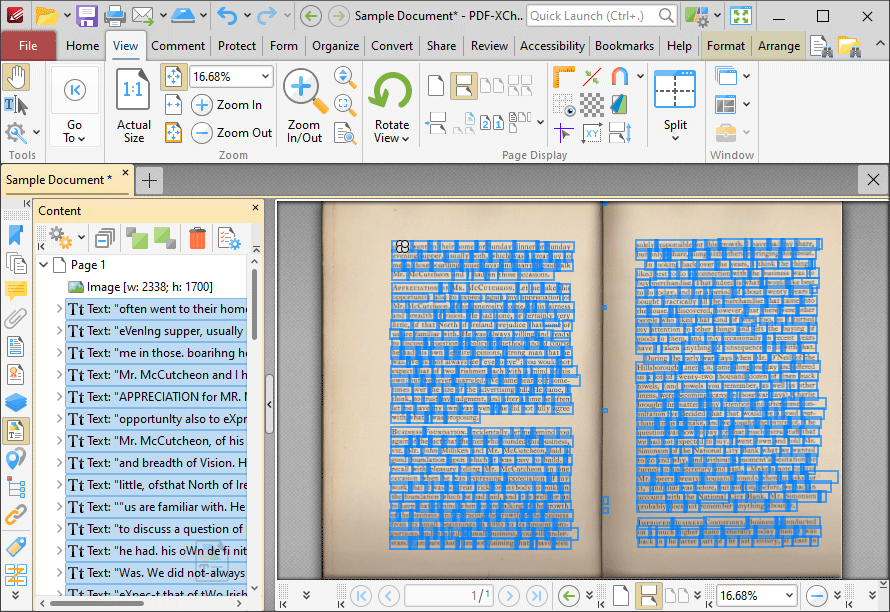
Figure 6. Text Selected in Content Pane, Corresponding Document Text Highlighted
8. Click the Format tab, then click the Fill Color dropdown menu and click the desired color for the text in the duplicate layer:
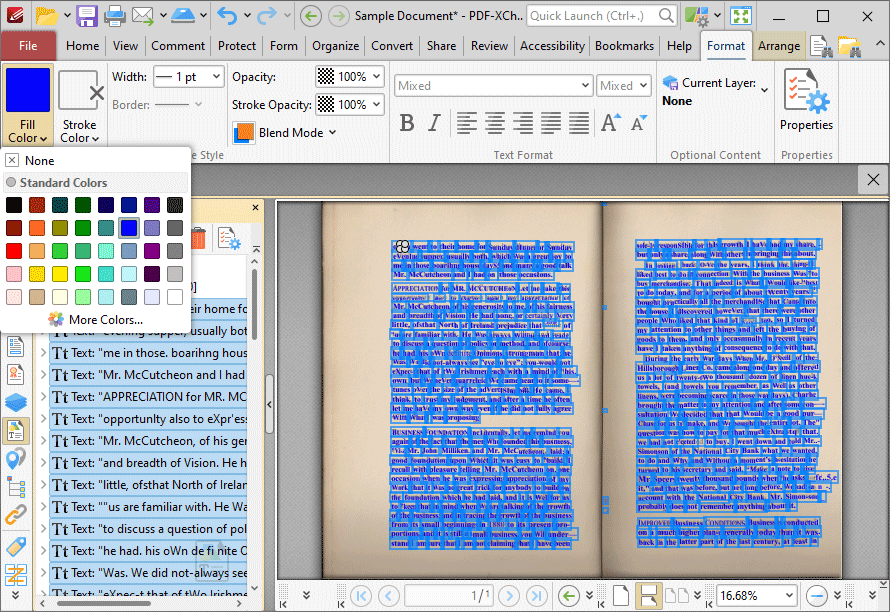
Figure 7. Format Tab, Fill Color Dropdown Menu
9. Return to the Content pane and delete the image-based content of the page on which the OCR operation was performed. Right-click images and then click Delete in the dropdown menu:
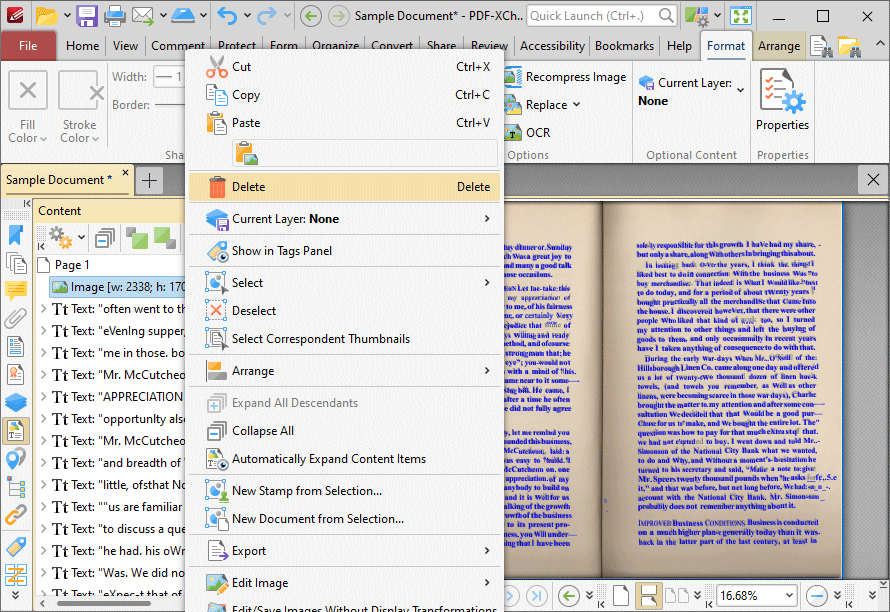
Figure 8. Content Pane, Delete Image Highlighted
The process is then complete, and the text can be edited as normal:
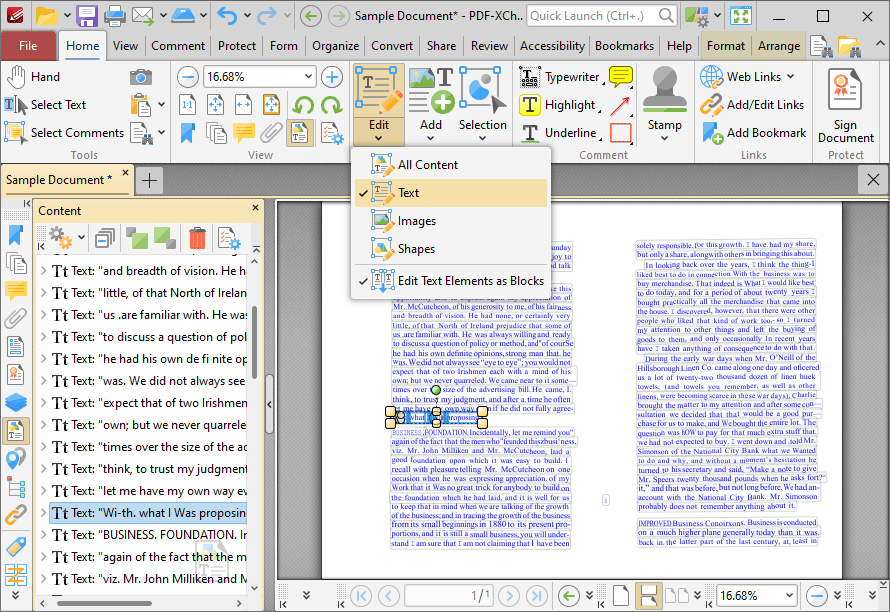
Figure 9. Editing Text After Performing OCR
10. Repeat the process for all pages that you want to edit. If you are editing a large document then it may save time to first delete all images from the document, then select and convert all the text in the document at the same time.
Please note:
•The main purposes of the OCR feature in the default OCR engine of PDF-XChange Editor is to make the text of scanned/image-based input documents searchable and selectable. When OCR is performed, PDF-XChange Editor identifies text-based content in input documents, then creates an invisible duplicate of it and inserts the duplicate text layer over the original text. This has the effect of converting image-based content into searchable/selectable text. The process detailed above can be used to edit the invisible, duplicate layer of OCR output - but as this is not one of the main purposes of the OCR feature, it may be problematic in some cases.
•When the process detailed above has been performed, it is possible to export documents and edit them in alternative formats/applications such as MS Word.
•You can customize preferences for OCR operations, such as the language and accuracy settings, using the options for the OCR feature detailed here.