 Adding Headers, Footers or Bates Numbering to PDFs
Headers and Footers
Headers and footers can be used to add text to the top and bottom margin of pages in PDF documents. Usually they are added to every page of the document and contain information such as the author's name and contact details, the title of the document and/or page numbering.
Adding Headers and Footers to Files
1. Click the Organize tab, then click the Header and Footer dropdown menu and click Add:
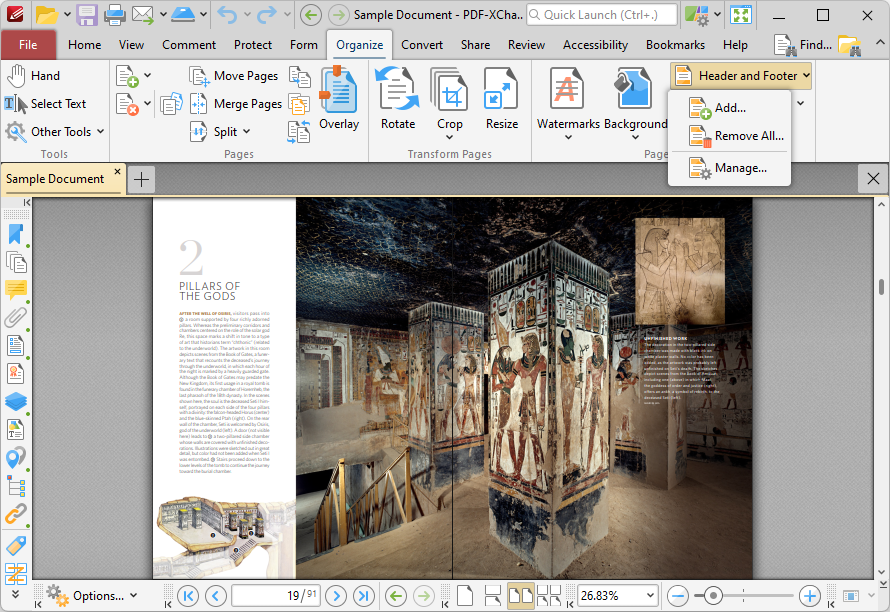
Figure 1. Organize Tab, Header and Footer Dropdown Menu
The Add Header and Footer dialog box will open:
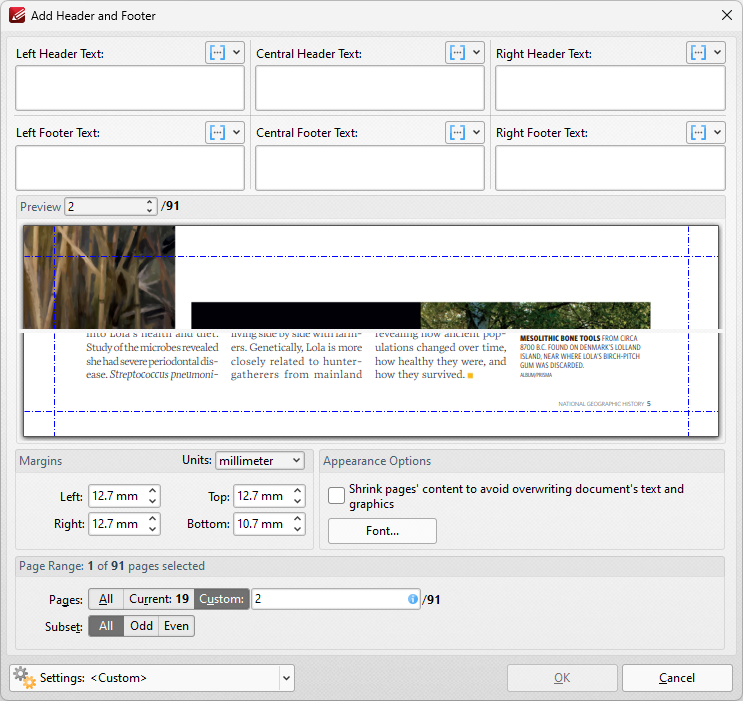
Figure 2. Add Header and Footer Dialog Box
•Enter text in the text boxes to insert headers/footers on the left/center/right of pages as desired. Alternatively, click the ![]() macro icon to use macros as the source for header/footer text. Further information about macros is available here.
macro icon to use macros as the source for header/footer text. Further information about macros is available here.
•Click Font to determine the font settings for headers and footers, as detailed in (figure 7) below.
•Use the Appearance Options settings to reposition the location of headers/footers.
•Enter page numbers in the Preview Page number box to view a preview of headers/footers in the preview window.
•Click Page Range Options to select the pages of the document that will feature headers/footers.
•Click the Settings dropdown arrow to save/delete customized settings and/or manage existing customized settings:
•Click ![]() to save settings.
to save settings.
•Click ![]() to remove settings.
to remove settings.
•Click ![]() to manage settings.
to manage settings.
Click OK to create headers/footers.
Removing Headers and Footers from Files
1. Click the Organize tab, then click the Header and Footer dropdown menu and click Remove All:

Figure 3. Organize Tab, Header and Footer Dropdown Menu
The Remove Headers and Footers dialog box will open:

Figure 4. Remove Headers and Footers Dialog Box
2. Click Yes to remove all headers and footers from the document.
Bates Numbering
Bates numbering is a dynamic way to provide identification, protection and automatic consecutive numbering within documents as they are processed/scanned.
Adding Bates Numbering to Files
1. Click the Organize tab, then click the Bates Numbering dropdown menu and click Add:

Figure 5. Organize Tab, Bates Numbering Dropdown Menu
The Add Bates Numbering dialog box will open:
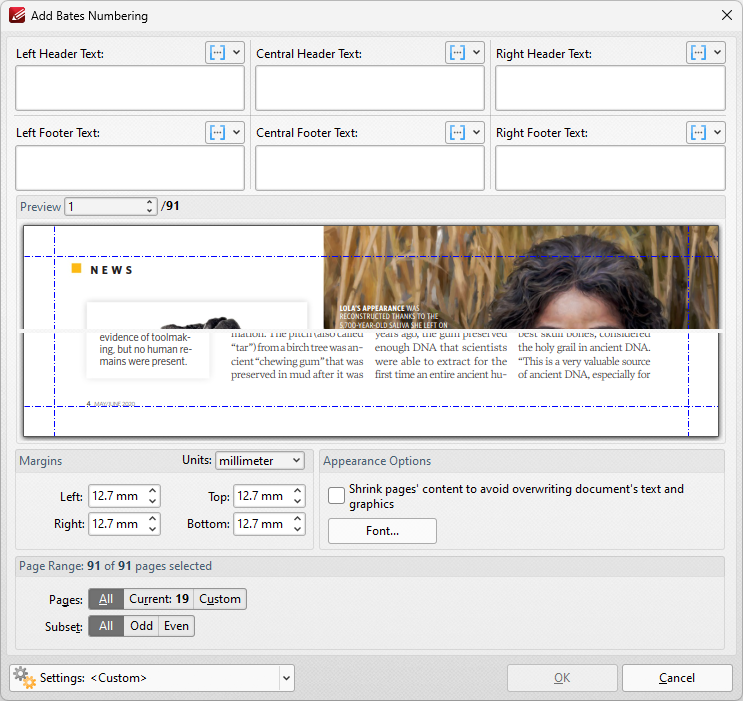
Figure 6. Add Bates Numbering Dialog Box
•Enter text in the text boxes to insert Bates numbering on the left/center/right and as a header/footer of pages as desired. Alternatively, click the ![]() macro icon to source the content of Bates numbering with macros. Further information about macros is available here.
macro icon to source the content of Bates numbering with macros. Further information about macros is available here.
•Click Font to determine the font settings for Bates numbering, as detailed below.
•Use the Appearance Options settings to reposition the location of Bates numbering.
•Enter page numbers in the Preview Page number box to view a preview of Bates numbering in the preview window.
•Click Page Range Options to select the pages of the document that will feature Bates numbering.
•Use the Settings dropdown menu to save/delete customized settings and/or manage existing customized settings:
•Click ![]() to save settings.
to save settings.
•Click ![]() to remove settings.
to remove settings.
•Click ![]() to manage settings.
to manage settings.
Click OK to add Bates numbering.
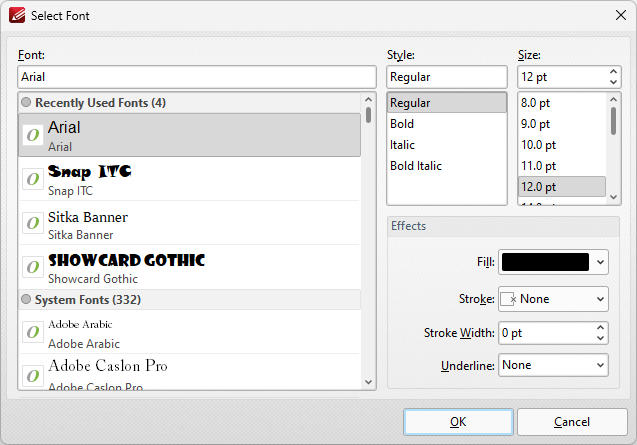
Figure 7. Select Font Dialog Box
•Use the Font text box to enter the name of the desired font, or select one from the options listed below the text box.
•Use the Style menu to determine the style of the font.
•Use the Size menu to determine the size of the font.
•Use the Fill menu to determine the color of the font.
•Use the Stroke menu to determine the color of the stroke. This color will border the text.
•Use the Stroke width menu to determine the size of the stroke.
•Use the Underline menu to enable/disable font underline.
Adding Continuous Bates Numbering to Multiple Files
Click Add to Multiple Files to add continuous Bates numbering to multiple files:

Figure 8. Organize Tab, Bates Numbering Dropdown Menu
The Add Bates Numbering to Files dialog box will open:
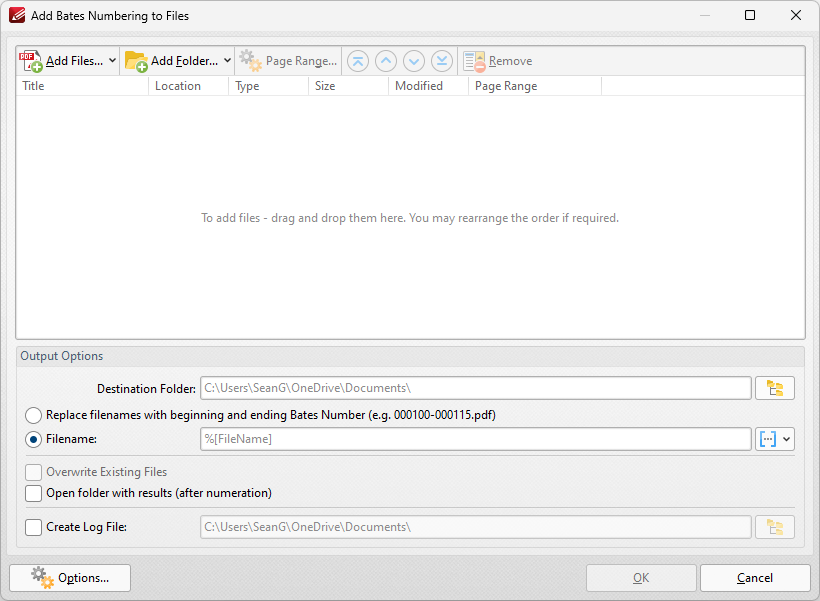
Figure 9. Add Bates Numbering to Files Dialog Box
•Click Add Files to add files from the local computer to the list of source files.
•Click Add Folder to add folders to the list of source files.
•Select files and then click Page Range to determine page ranges for Bates numbering.
•Use the blue arrow icons to move selected documents to the top/bottom of the list, or to move them up/down in the order of documents. The order in which documents are listed determines the order of Bates numbering throughout the documents.
•Click Remove to remove selected documents from the list.
•Select Replace file names with starting and ending Bates number as desired.
•Use the Output Options to determine options for output files:
•Select the upper radio button to convert filenames to Bates numbering.
•Select the lower radio button to enter a custom name for converted files. Enter the desired name/folder in the text boxes. Click the blue icon to use macros as desired. Use the Destination Folder test box, or click the yellow icon, to determine the location of converted files.
•Select the Overwrite Existing Files, Open folder with results and Create Log File boxes as desired..
•Click Options to determine the Bates numbering options as detailed in (figure 2) above.
Click OK to insert Bates numbering into the documents.
Removing Bates Numbering from Files
1. Click the Organize tab, then click the Bates Numbering dropdown menu and click Remove All:
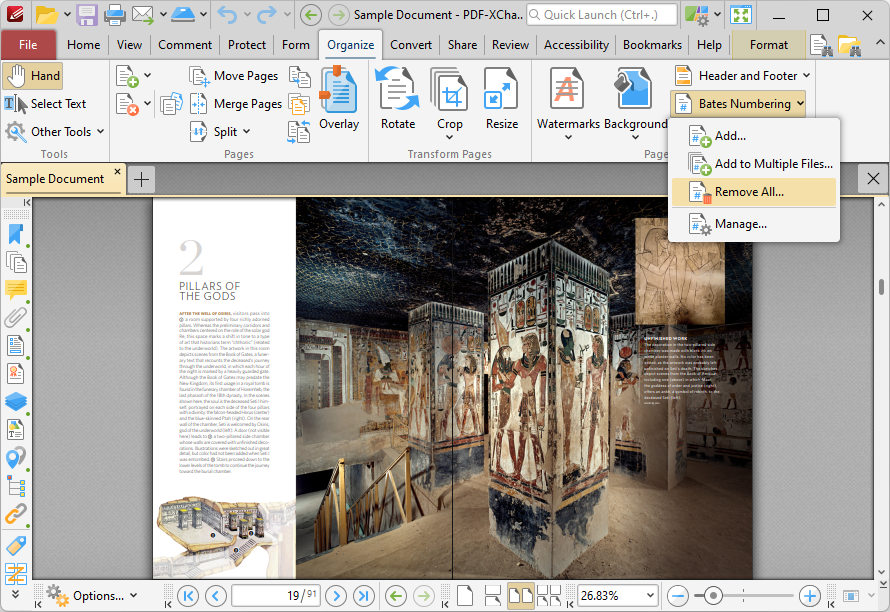
Figure 10. Organize Tab, Bates Numbering Dropdown Menu
The Remove Bates Numberings dialog box will open:

Figure 11. Remove Bates Numberings Dialog Box
2. Click Yes to remove Bates numbering from the document.