 Add/Edit Video Annotations
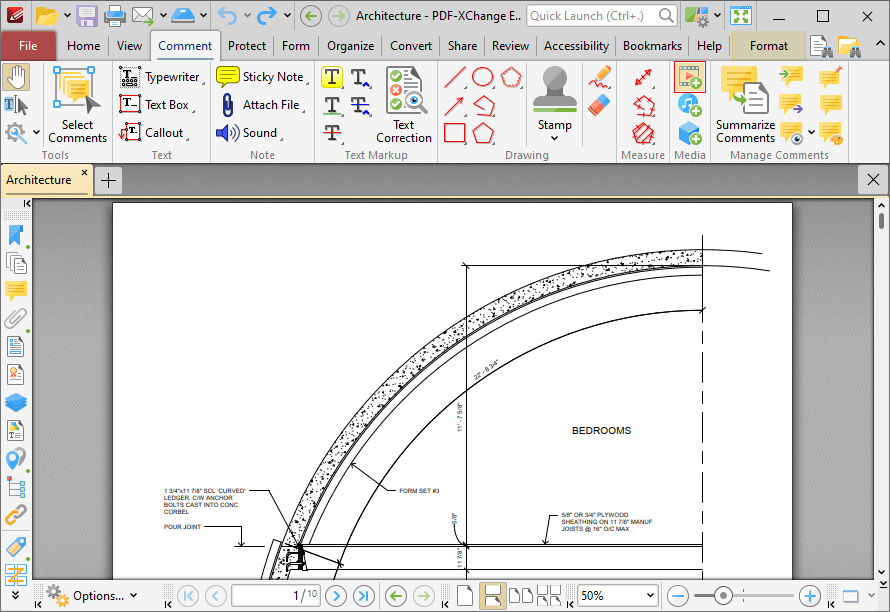
Click Add/Edit Video to add/edit video annotations:

Figure 1. Comment Tab, Add/Edit Video Highlighted
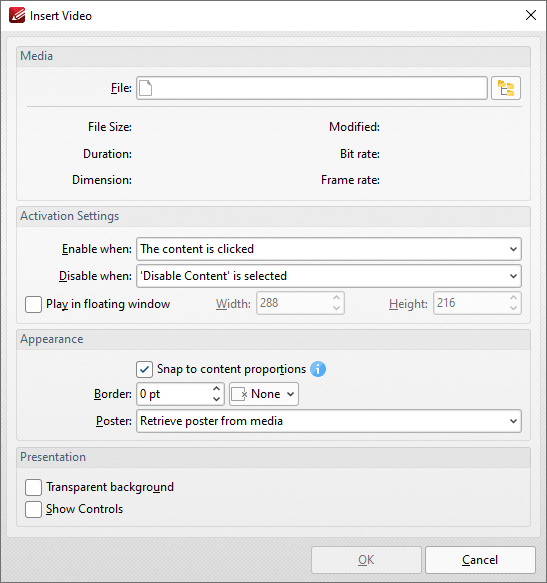
The pointer will become a crosshairs icon. Click and drag to determine the location at which you want to insert the video annotation. The Insert Video dialog box will open:

Figure 2. Insert Video Dialog Box
•Click the File text box/icon to select the file to be inserted into the document.
•Use the Enable when dropdown menu to determine when the video is enabled.
•Use the Disable when dropdown menu to determine when the video is disabled.
•Select the Play in floating window box to play the video in a floating window when the annotation is selected. Use the Width and Height boxes to determine the width and height of the floating window.
•Select the Snap to content proportions to scale the rectangle in which the video is placed to the same proportions as the video content.
•Use the Border dropdown menus to determine the size and color of the border used for the annotation.
•Use the Poster dropdown menu to determine the image used as the poster for the annotation.
•Select the Transparent background box to give the annotation a transparent background.
•Select the Show Controls box to display controls for playing, pausing, stopping and controlling the volume when the video plays.
Click OK to add the video annotation.
The Rich Media Properties Pane
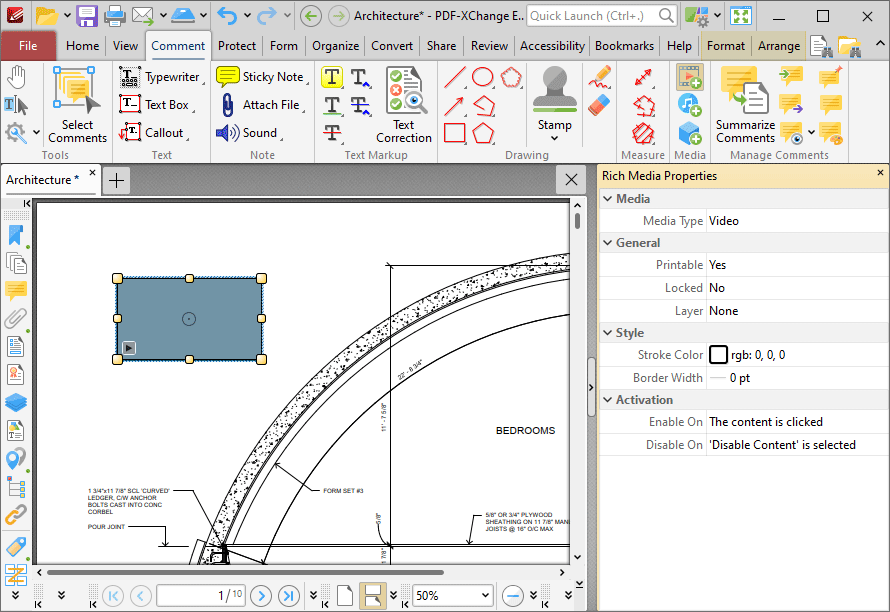
When video annotations are selected, it is possible to view/edit their properties in the Rich Media Properties pane:

Figure 3. Rich Media Properties Pane
•Media Type is the media type of the annotation.
•Printable is the print status of the annotation. If this property is enabled then the annotation is printed with the document. If this property is not enabled then the annotation is not printed.
•Locked is the locked status of the annotation. If this property is enabled then the annotation cannot be deleted and its properties (including its position and size) cannot be modified by users.
•Layer determines the optional content layer to which the annotation belongs. Further information about layers is available here.
•Stroke Color determines the border color of the annotation.
•Border Width determines the border width of the annotation.
•Enable On determines when the annotation is enabled.
•Disable On determines when the annotation is disabled.
Note that it is necessary to click Add/Edit Video in order to edit existing video annotations.