 The PDF-XChange Updater
The PDF-XChange Updater is used to check for and download updates to the software applications included in PDF-XChange PRO. Follow the steps below to access and edit updater settings:
PDF-XChange Editor
Click the Help tab, then click Check for Updates:
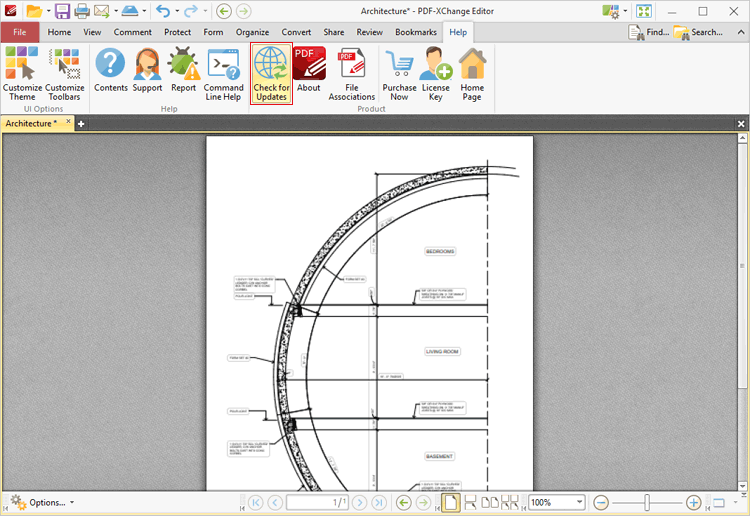
Figure 1. Help Tab, Check for Updates
The PDF-XChange Update dialog box will open, as detailed below.
PDF-Tools
Click the Help dropdown menu, then click Check for Updates:
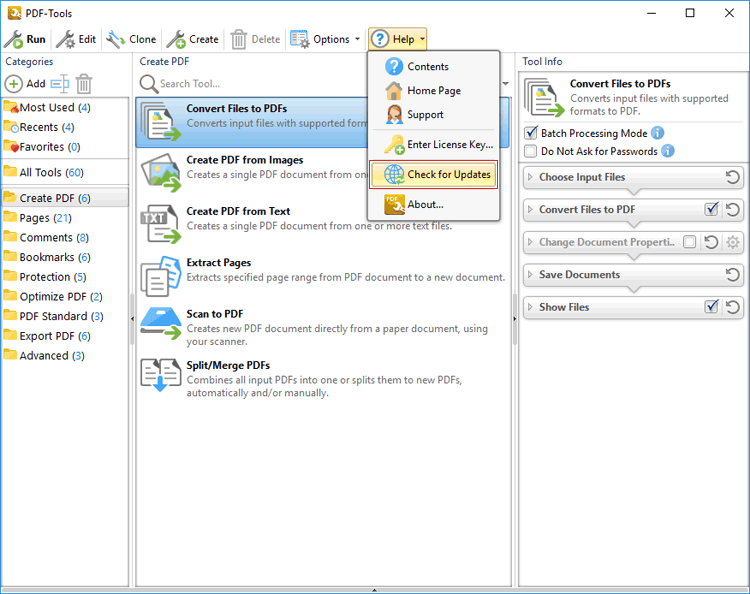
Figure 3. Help Dropdown Menu, Check for Updates
The PDF-XChange Update dialog box will open, as detailed below.
PDF-XChange Standard
1. Click the Windows Start Button.
2. Click Control Panel. The Control Panel dialog box will open.
3. Click Devices and Printers in the Control Panel dialog box.
4. Move to the Printers tab and right-click PDF-XChange Lite.
5. Click Printing Preferences. The PDF-XChange Lite Printing Preferences dialog box will open.
6. Click the About tab, then click Check for Updates in the Help dropdown menu to open the PDF-XChange Updater:
![]()
Figure 3. About Tab, Check for Updates
The PDF-XChange Update dialog box will open, as detailed below.
The PDF-XChange Updater
![]()
Figure 4. PDF-XChange Update Dialog Box
•Available updates are displayed in the main window. Click the Download button to download and install available updates.
•Click Update History to view a breakdown of recent updates.
•Click Installed Products to view a breakdown of installed products from PDF-XChange.
•Click Settings to customize settings for the PDF-XChange Updater. These options are detailed beneath (figure 3) below.
•Click Help to launch the online help for the PDF-XChange Updater.
•Select/clear the Show Hidden Updates box to show/hide hidden updates.
•Click Check Again to check for more recent updates.
•Click Close to close the PDF-XChange Update dialog box.
Settings
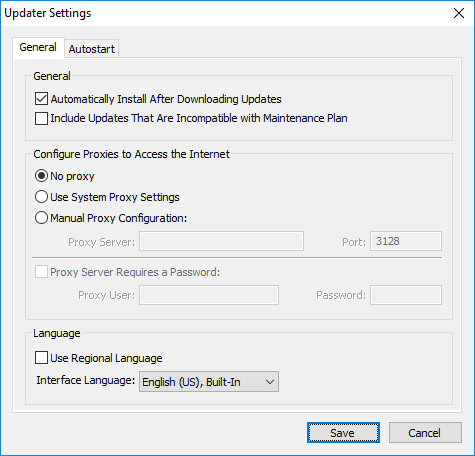
Figure 5. Updater Settings Dialog Box
•Select/clear the Automatically Install After Downloading Updates box to enable/disable the automatic installation of downloaded updates.
•Select/clear the Include Updates That Are Incompatible with Maintenance Plan box to include/exclude products that are not included in your current maintenance plan. Note that if updates are listed here and your license has expired, then the software will revert to evaluation mode when the updates are downloaded.
•Select an option in the Configure Proxies to Access the Internet section to determine the proxy that the updater uses to access the internet:
•Select No Proxy to disable the use of a proxy to access the internet.
•Select Use System Proxy Settings to use the current system proxy settings to access the internet.
•Select Manual Proxy Configuration to use a custom proxy, then enter the Proxy Server and Port number details in the text boxes.
•Select the Proxy Server Requires a Password box to set a password for the use of Proxy Server when the Manual Proxy Server option above is used, then enter the Proxy User and Password details in the text boxes.
•Select the Use Regional Language box to use the regional language as the interface language for downloaded updates, or select a different option from the dropdown menu. Note that the language of the user interface can be subsequently changed as desired in the user preferences.
•Click Save to save settings.
Autostart
Use the Autostart tab to set a schedule for automatically checking for updates to the software:
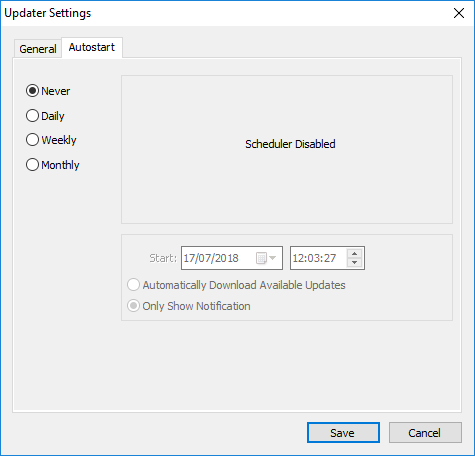
Figure 6. Updater Settings Dialog Box, Autostart Tab
•Select Never to disable this feature.
•Select Daily, Weekly or Monthly to check for updates automatically on a daily, weekly or monthly basis as desired. Note that different scheduling options are available depending on which option is used.
•Use the Start text box to determine the date and time at which the schedule starts.
•Select Automatically Download Available Updates to download available updates automatically, or select Only Show Notification to receive a notification that updates are available instead.
Click Save to save settings.