 Add Timestamp
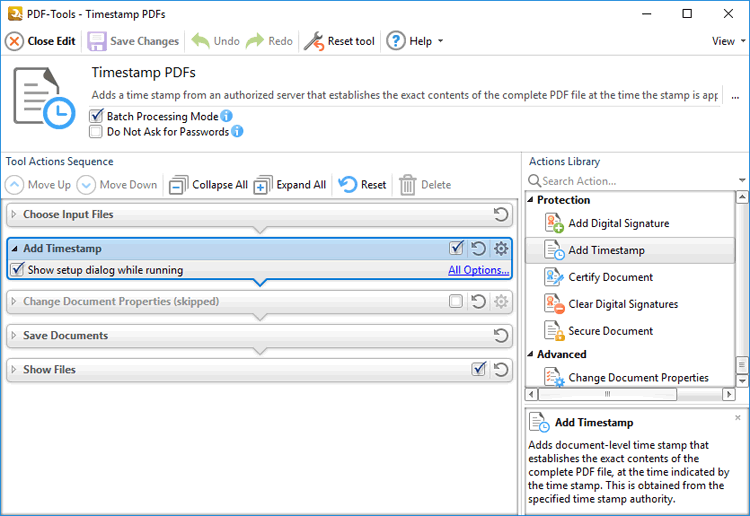
The Add Timestamp action adds document-level timestamps to input documents. It contains the following customizable parameters:

Figure 1. Add Timestamp Action Options
•Click All Options to view/edit all options. The Timestamp Server dialog box will open, as detailed below.
•Select the Show setup dialog while running box to launch the Timestamp Server dialog box and customize settings each time this action is used. Clear this box to disable the Timestamp Server dialog box from opening each time the action is used, which is useful when the same settings are used consistently.

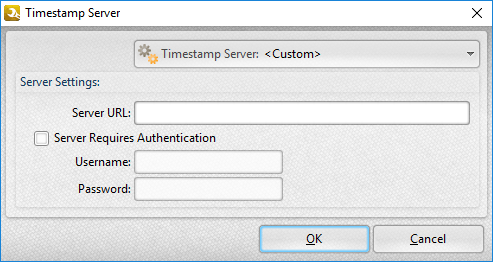
Figure 2. Timestamp Server Dialog Box
•Use the Timestamp Server dropdown menu to select a timestamp server.
•If a timestamp server is being used for the first time then enter the website address in the Server URL text box.
•If the selected timestamp server requires authentication then select the indicated box and enter the User Name and Password in the associated text boxes.
•Click Timestamp Server dropdown menu to save/delete/manage customized settings, as detailed below.
Click OK to save settings.

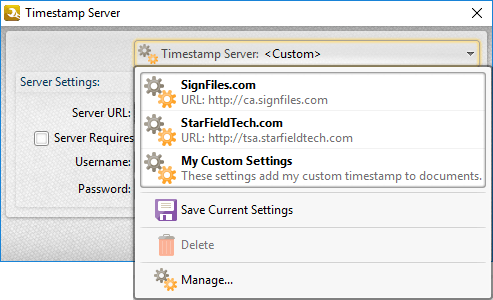
Figure 3. Timestamp Server Dropdown Menu
•Click ![]() Save to save the current settings to a profile for subsequent use.
Save to save the current settings to a profile for subsequent use.
•Click ![]() Delete to delete the current profile.
Delete to delete the current profile.
•Click ![]() Manage to manage saved profiles. The Manage Presets dialog box will open:
Manage to manage saved profiles. The Manage Presets dialog box will open:

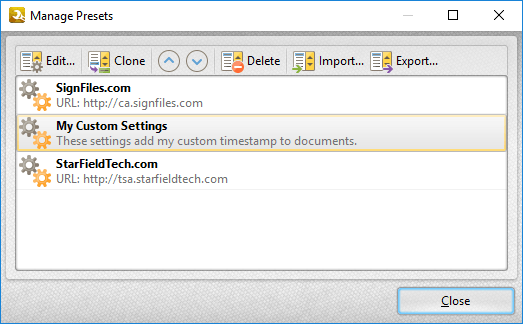
Figure 4. Manage Presets Dialog Box
•Click Edit to edit selected profiles.
•Click Clone to clone selected profiles.
•Use the up and down arrows to move selected profiles up or down in the list.
•Click Delete to delete selected profiles.
•Click Import to import profiles from a saved file.
•Click Export to export profiles to file.