 Destinations
Click Destinations to open the Named Destinations pane:
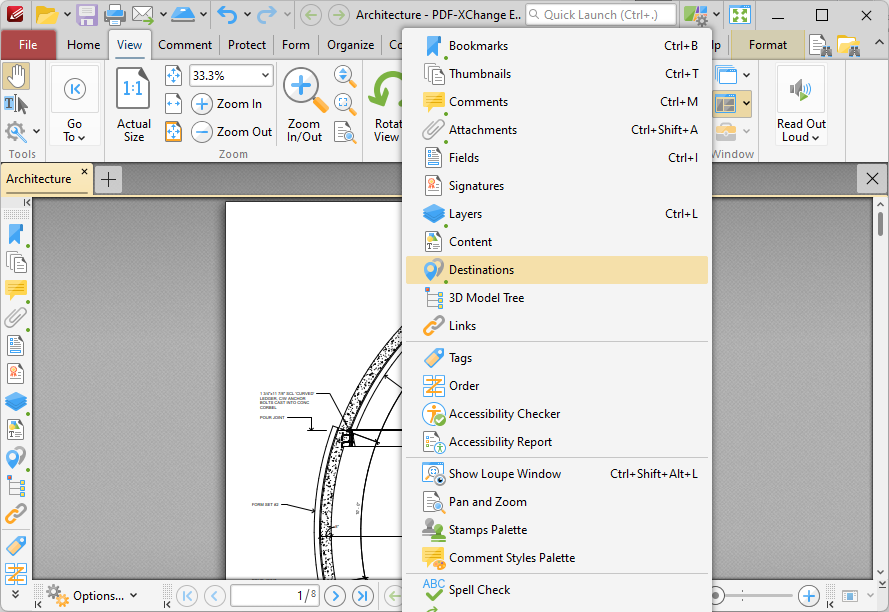
Figure 1. View Tab, Panes Dropdown Menu, Destinations
The Named Destinations pane is used to view/edit named destinations:
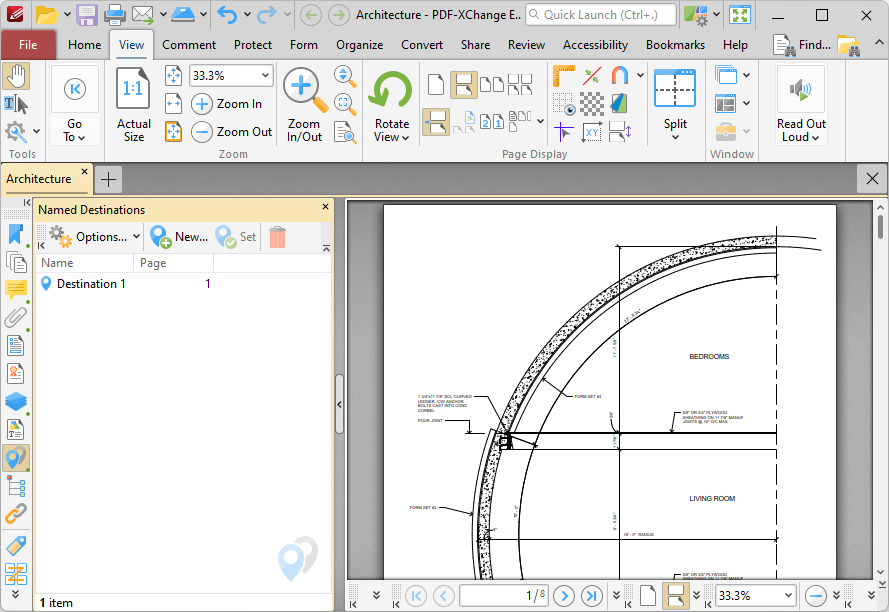
Figure 2. Named Destinations Pane
Named destinations are user-defined locations in documents. They can be used in conjunction with Bookmarks, Go To Page actions and the /Open command line to navigate to specified locations. Double-click named destinations to move to their location in the document. Use the icons in the Named Destinations pane to perform the following operations:
Click ![]() New Destination to create a new named destination from the current view.
New Destination to create a new named destination from the current view.
Click ![]() Set to set the current view as the new view for the selected named destination.
Set to set the current view as the new view for the selected named destination.
Click ![]() Delete to delete selected named destinations.
Delete to delete selected named destinations.
Click ![]() Options for named destination options:
Options for named destination options:
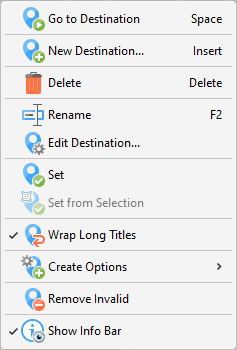
Figure 3. Named Destination Options
•Click Go to Destination to move to selected destinations.
•Click New Destination (or press Insert) to create a new named destination from the current view.
•Click Delete to delete selected named destinations.
•Click Rename to rename selected named destinations.
•Click Edit Destination to edit the location of the named destination, as detailed below.
•Click Set to set the current view as the target for the selected named destination.
•Click Set from Selection to set the current selection as the target for the selected named destination.
•Click Wrap Long Titles to spread long named destination titles over multiple lines.
•Click Create Options to view options for creating named destinations
•Click Use Inherited Zoom to enable/disable inherited zoom in the creation of named destinations.
•Click Use Current Page to specify the use of the current page for named destinations. If this option is not selected then the first visible page will be used.
•Click Use Selected Text as title to use selected text as the title when creating new named destinations.
•Click Use Selected Region as Destination to use selection regions as the destination when creating new named destinations.
•Click Remove Invalid to remove named destinations that do not have a valid destination.
•Click Show Info Bar to show/hide the information bar at the bottom of the Named Destinations pane.
Create Named Destinations from Selected Text
When you are creating named destinations, it is also possible to use the Select Text Tool to create a named destination from selected text in the current document. Follow the steps below to use this method to create named destinations:
1. Click the Home tab, then click to enable the Select Text Tool and click and drag to highlight the text you want to use to create the named destination:
Figure 4. Home Tab, Select Text Tool Enabled, Text Highlighted
2. Click the Destinations shortcut in the Quick Tools toolbar to open the Named Destinations pane:
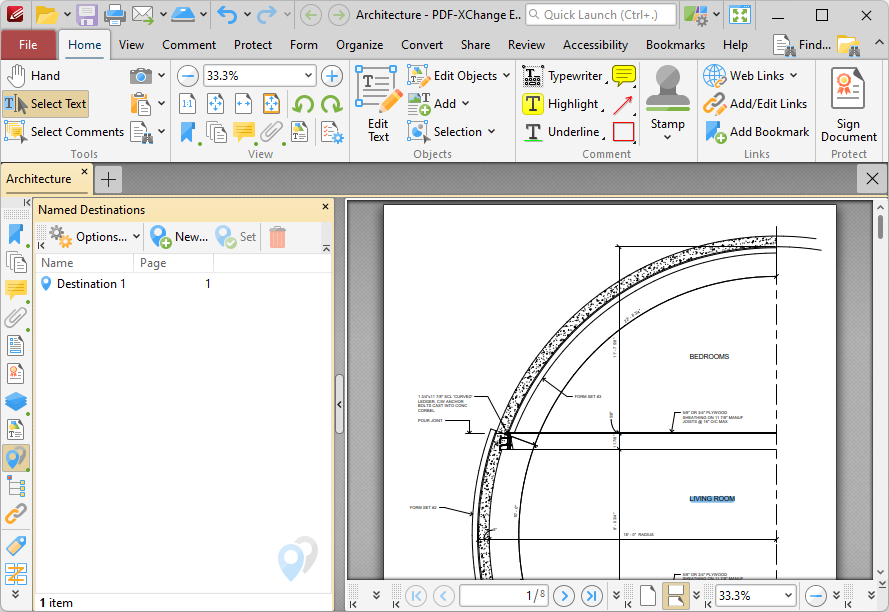
Figure 5. Named Destinations Pane Open
3. Click New in the Named Destinations pane to create a new named destination that uses the highlighted text as the name of the new named destination:
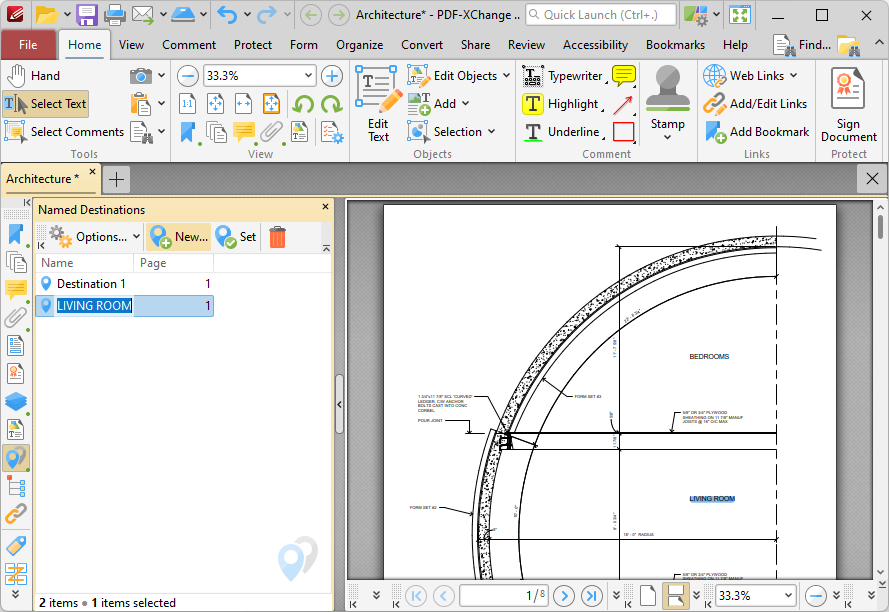
Figure 6. New Named Destination Created from Selected Text
Editing the Location of Named Destinations
Right-click named destinations in the Named Destinations pane and click Edit Destination to edit the location of named destinations:
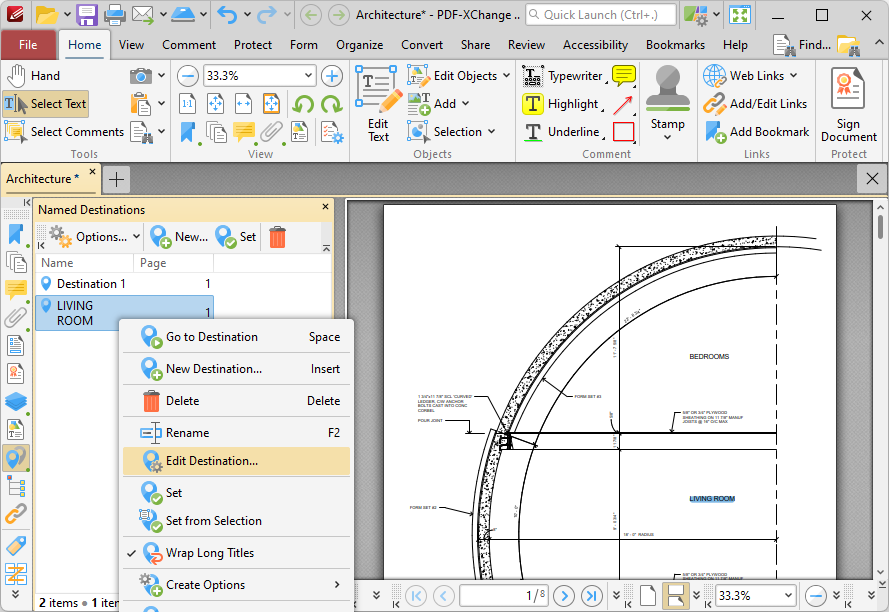
Figure 7. Named Destinations Submenu, Edit Destination Highlighted
The Edit Destination dialog box will open:
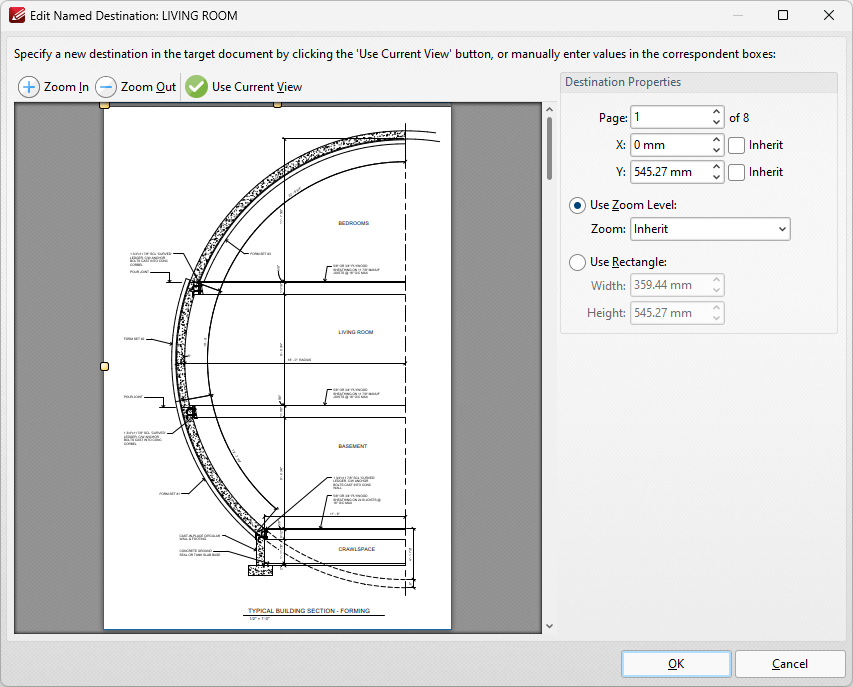
Figure 8. Edit Destination Dialog Box
•Use the Page dropdown menu to set the page number for the named destination.
•Use the X and Y dropdown menus to determine the X and Y coordinates of the named destination, or select the Inherit box to use the existing X/Y coordinates of the named destination.
•Select an option in the Zoom dropdown menu to determine the zoom used for the named destination. Alternatively, select the Use Rectangle button to specify a rectangle to use, then enter the desired dimensions in the Width and Height number boxes.
•Note that you can also click and drag the yellow points in the dialog box to specify X/Y coordinates/width and height values as desired.
Click OK to save changes.